
Workflow Editor
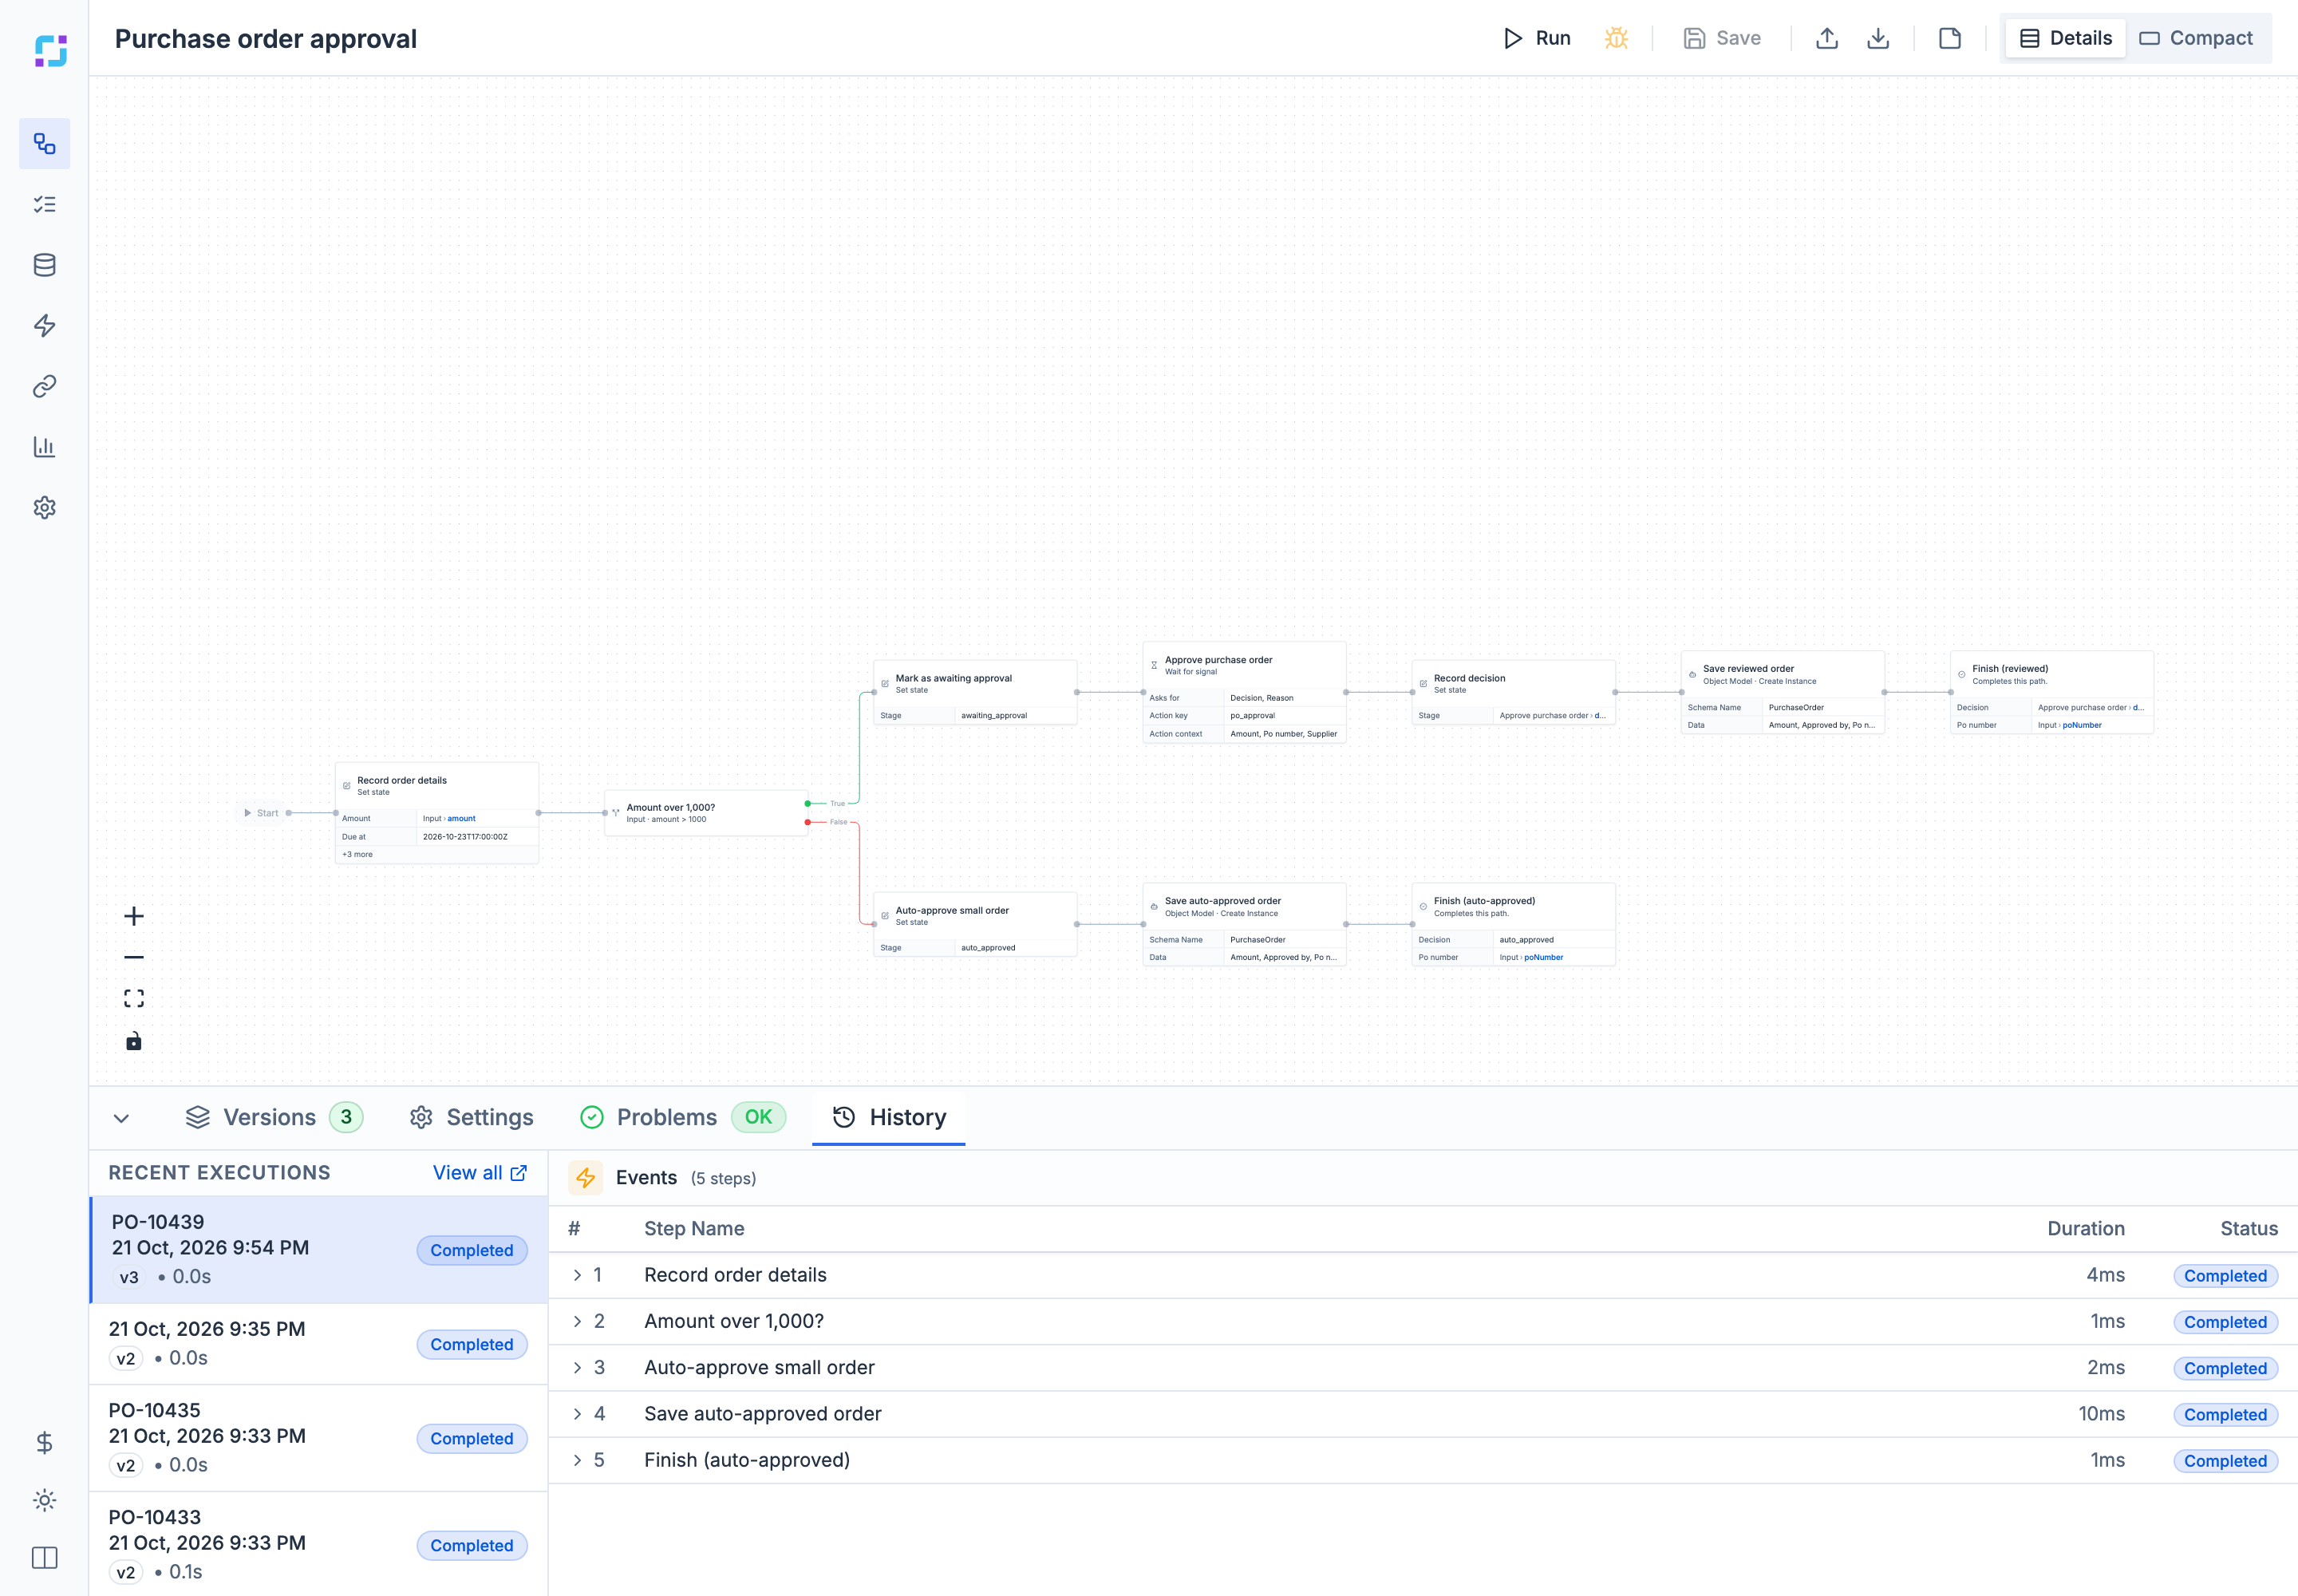
The workflow editor opens when you select a workflow. It has three parts: the toolbar at the top, the canvas with the workflow’s steps, and the bottom panel with Versions, Settings, Problems, and History.
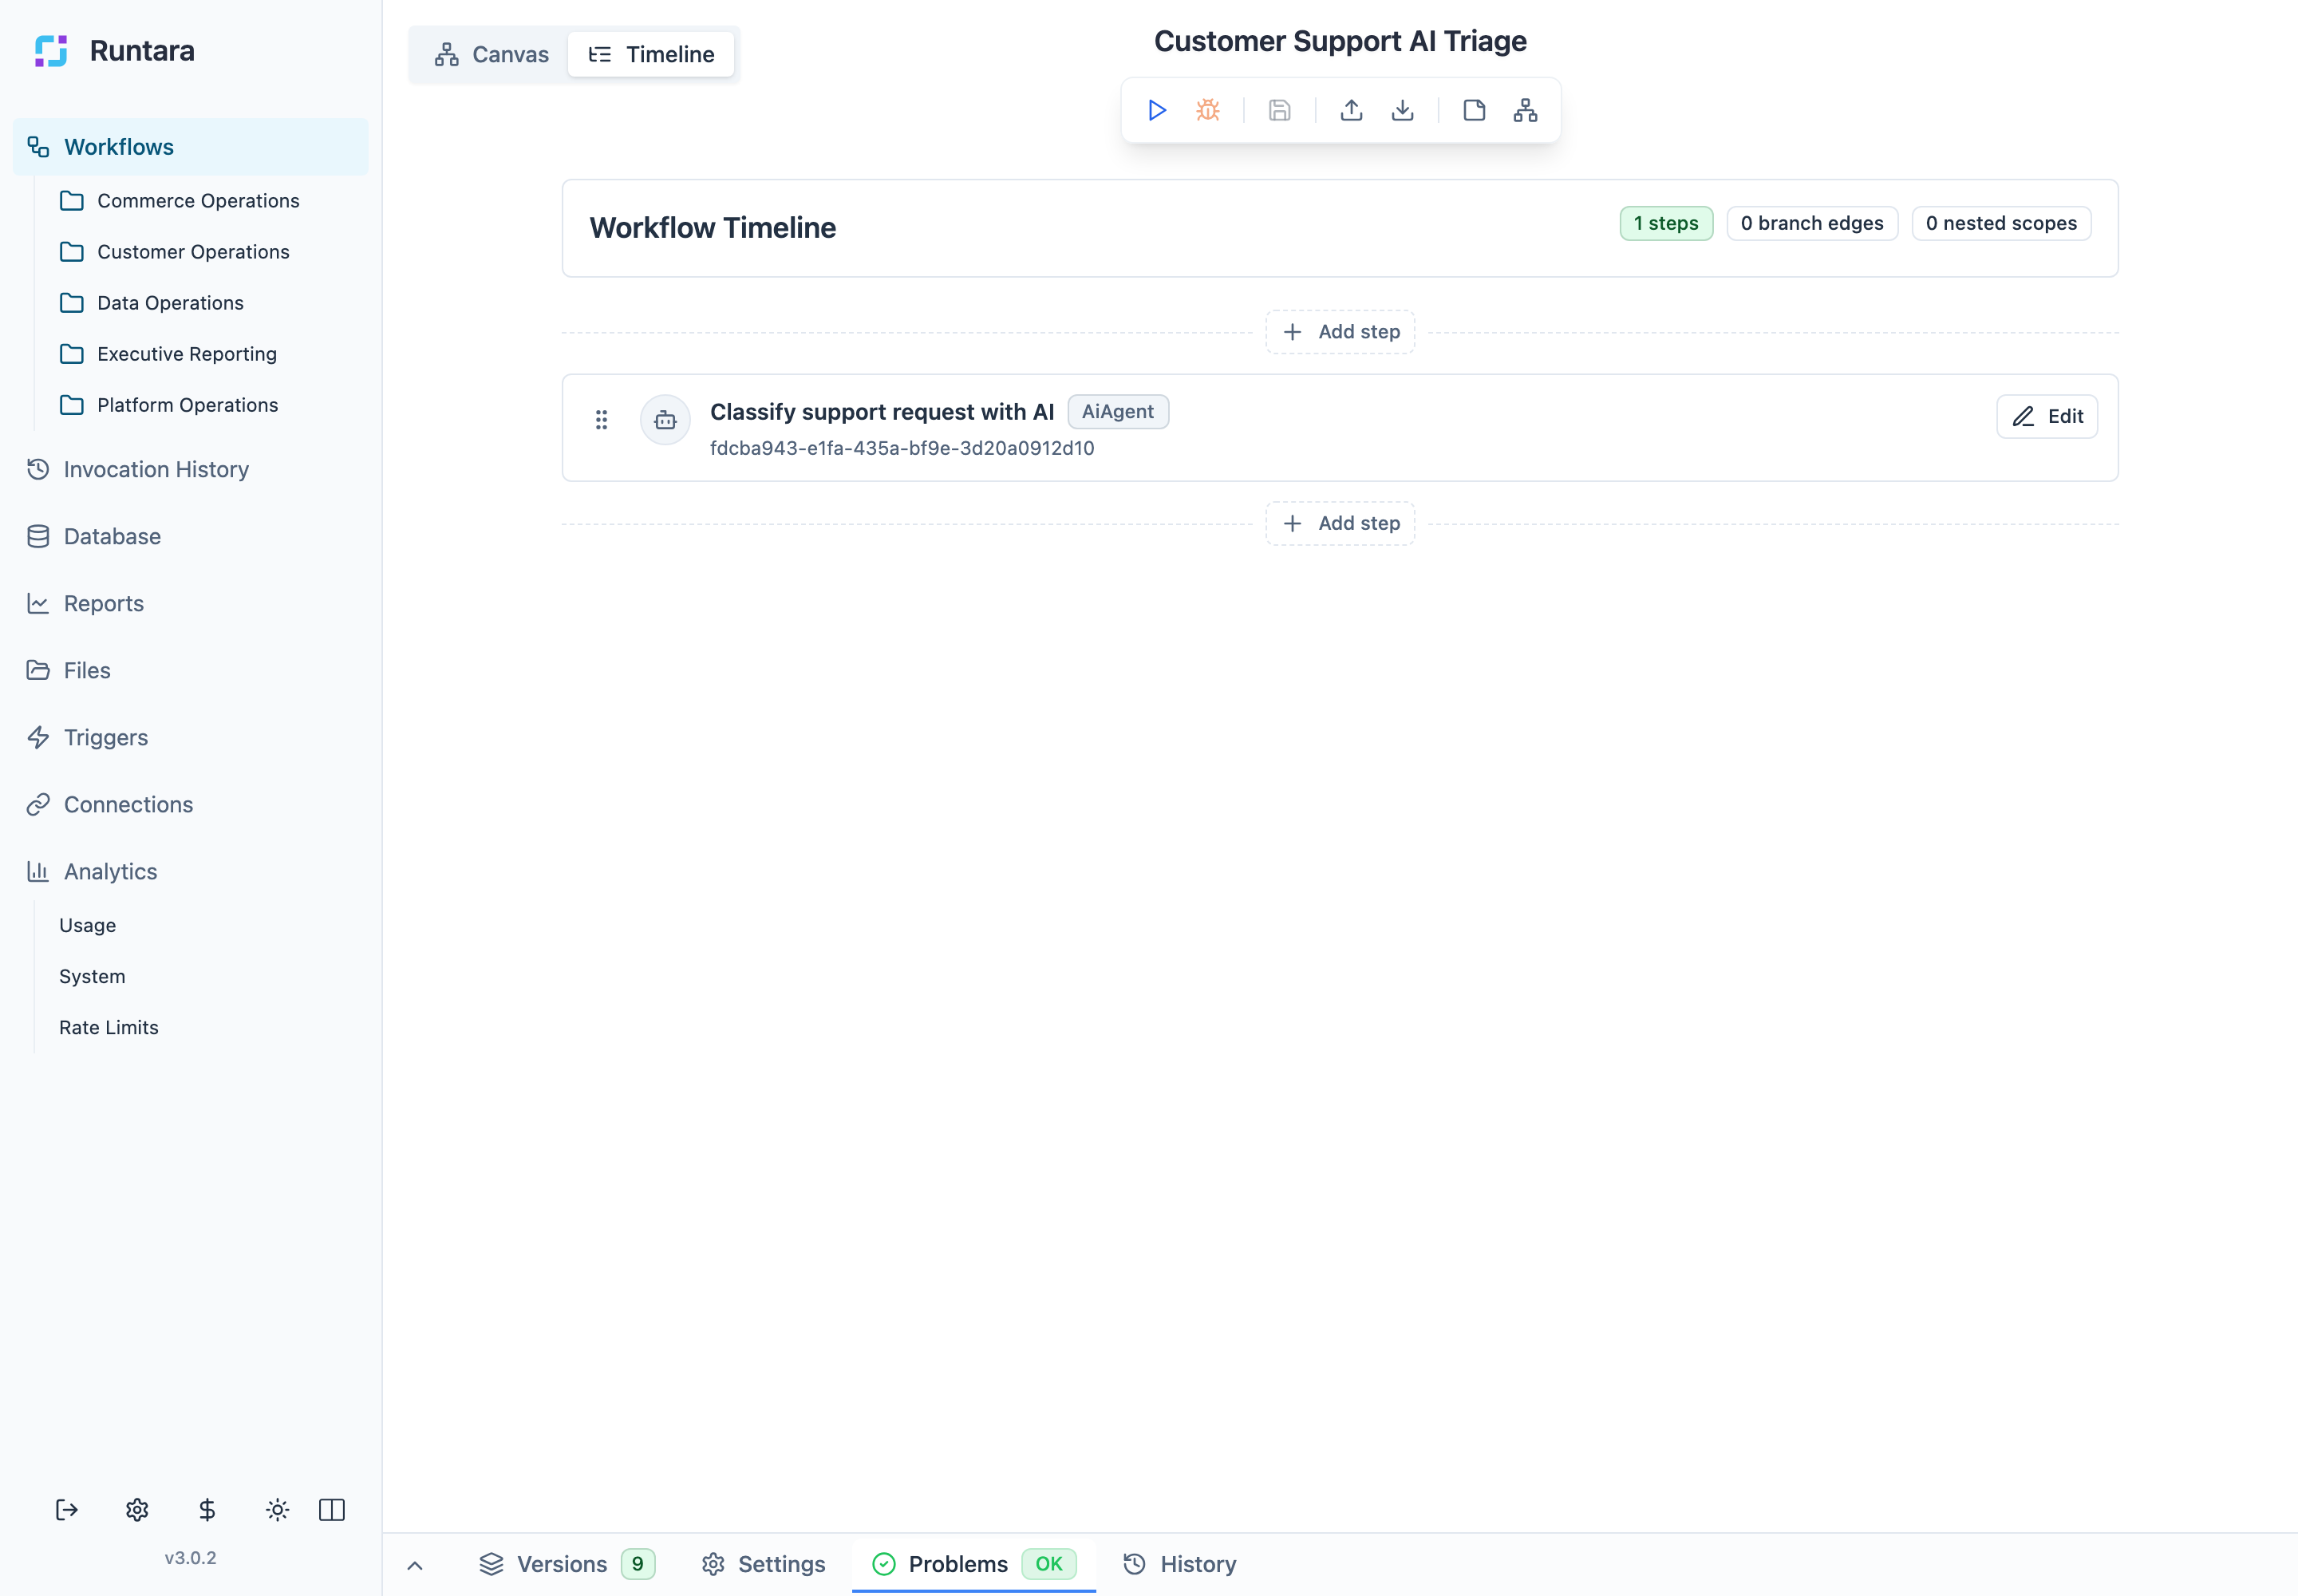
Changed: earlier versions of the editor had separate Canvas and Timeline views. There is now one canvas, with a Details / Compact switch for how much each step card shows. The step timeline lives on each run’s execution details page.
Toolbar
The workflow name is on the left. While Runtara compiles a saved version you see Compiling, then Compiled (or Compile failed with the reason). While a run is attached to the editor, its status is shown too, for example Paused at breakpoint or Completed.
The buttons on the right, from left to right:
| Button | What it does |
|---|---|
| Run | Starts the workflow, asking for inputs first if it has any. Save your changes before running. |
| Debug (bug icon) | Starts a run that pauses at breakpoints. Available once at least one step has a breakpoint. See Debug a workflow. |
| Continue | Shown while paused at a breakpoint. Runs to the next breakpoint. |
| Stop | Shown while an attached run is active. Stops it. |
| View execution details | Shown while a run is attached. Opens it in the History tab. |
| Clear execution results | Shown while a run is attached. Detaches the run so you can edit again. |
| Save | Saves your changes as a new version. Highlighted when there is something to save. |
| Export workflow | Downloads the workflow definition as a JSON file. |
| Import workflow | Loads a workflow definition from a JSON file. The import replaces the canvas but is not saved until you select Save. |
| Add note | Adds a sticky note. With a step selected, the note is attached to that step. |
| Details / Compact | Details shows each step’s configured inputs on its card. Compact shows step names only; hover a step to see its inputs. Your choice is remembered. |
If you try to leave with unsaved changes, the editor asks whether to Keep editing or Discard changes.
The canvas
Steps are laid out automatically from left to right, starting at Start. Lines show the order; a step with two outgoing lines branches.
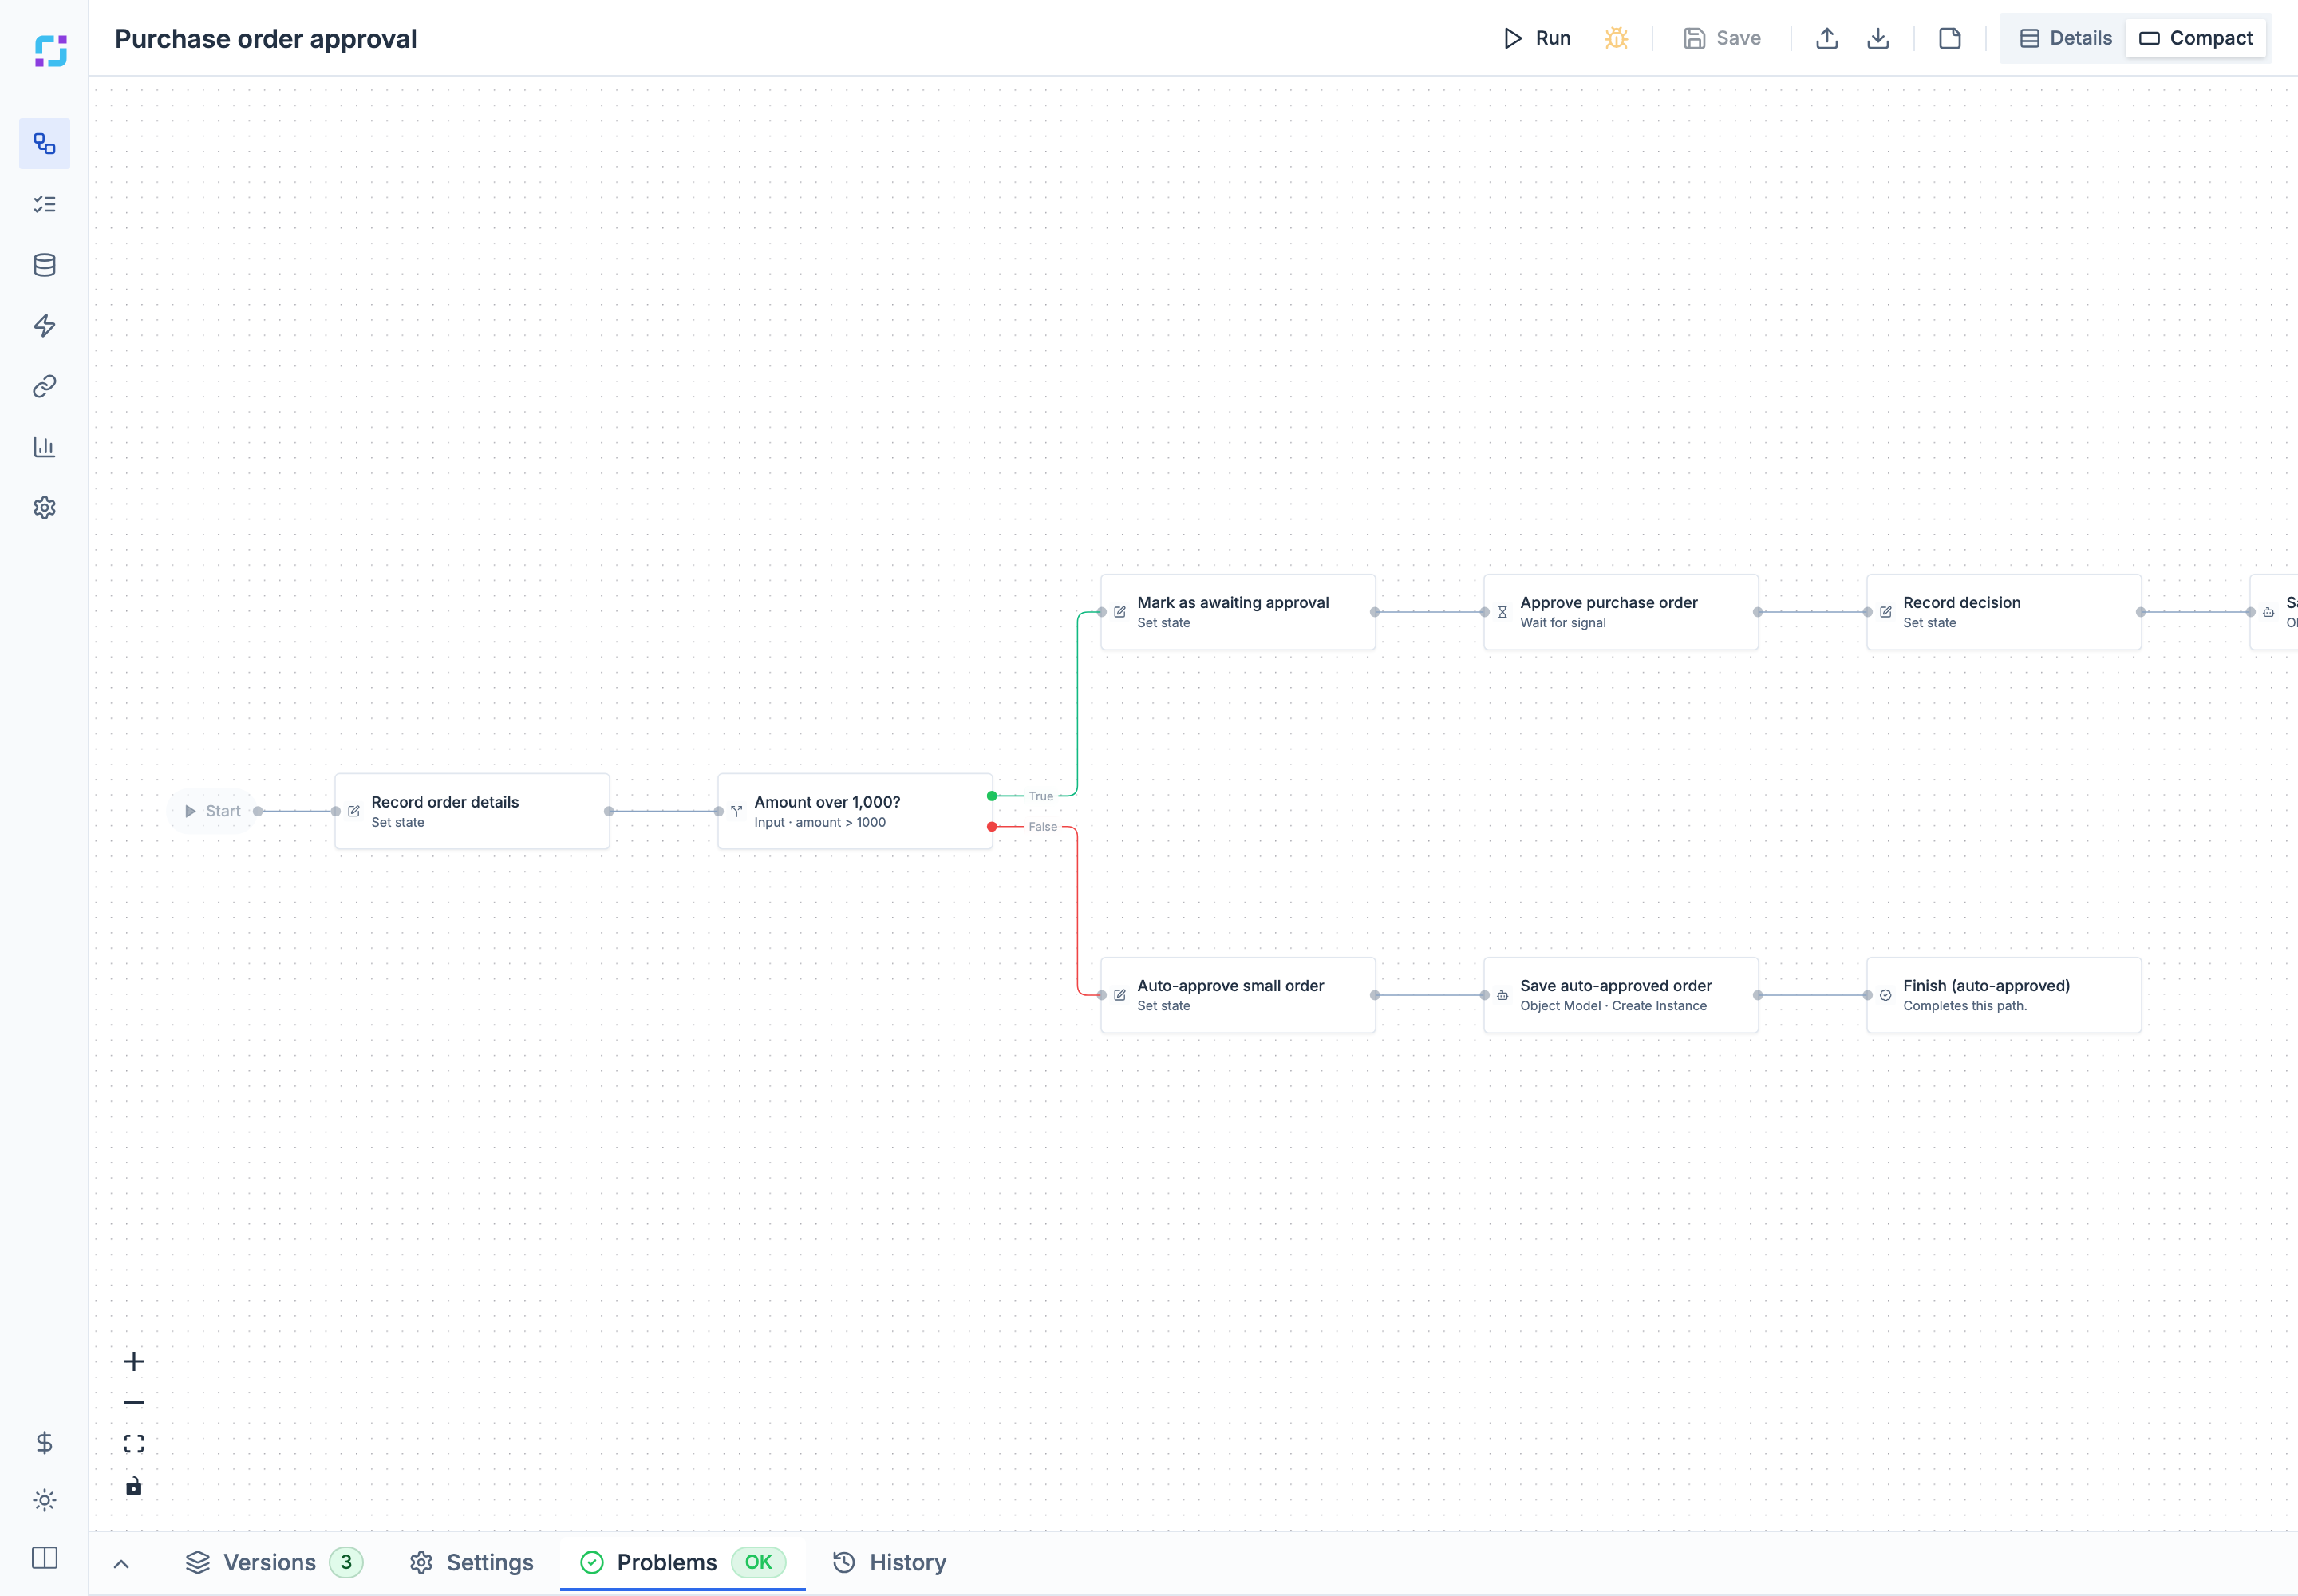
- Move around by dragging the background and zooming with the mouse wheel or trackpad. The controls in the bottom-left corner zoom in, zoom out, fit the whole workflow on screen, and lock the canvas.
- Hover a step to see its type, its configured inputs, and its ID.
- Double-click a step to open its settings panel. While the panel is open, a single click on another step switches the panel to it.
- Add steps with the + buttons that appear when you hover: on Start of an empty workflow (Add first workflow step), after the last step of a path, or on a line between two steps (Insert a step). A line also offers Add a parallel branch.
- Branches. A Conditional step has a green true and a red false output; a Switch step has one output per case and a default. Hover an output’s + to add the first step of that branch.
- Error handlers. Hover a step that can fail (agent calls, sub-workflows, loops, waits) and choose Add error handler to route its failures to an Error step or any other path, instead of failing the run.
- Route settings. The settings button on a line opens Route settings: an optional Priority and a Condition that must be true for the run to take that line. Use Delete route to remove the line.
- Delete a step by selecting it and pressing Delete or Backspace. There is no confirmation, but nothing is final until you save.
- Notes support Markdown. Double-click a note to edit it, and drag it next to a step to attach it.
A small amber dot on a step card marks unsaved changes to that step.
Configure a step
Double-click a step to open its panel on the right.
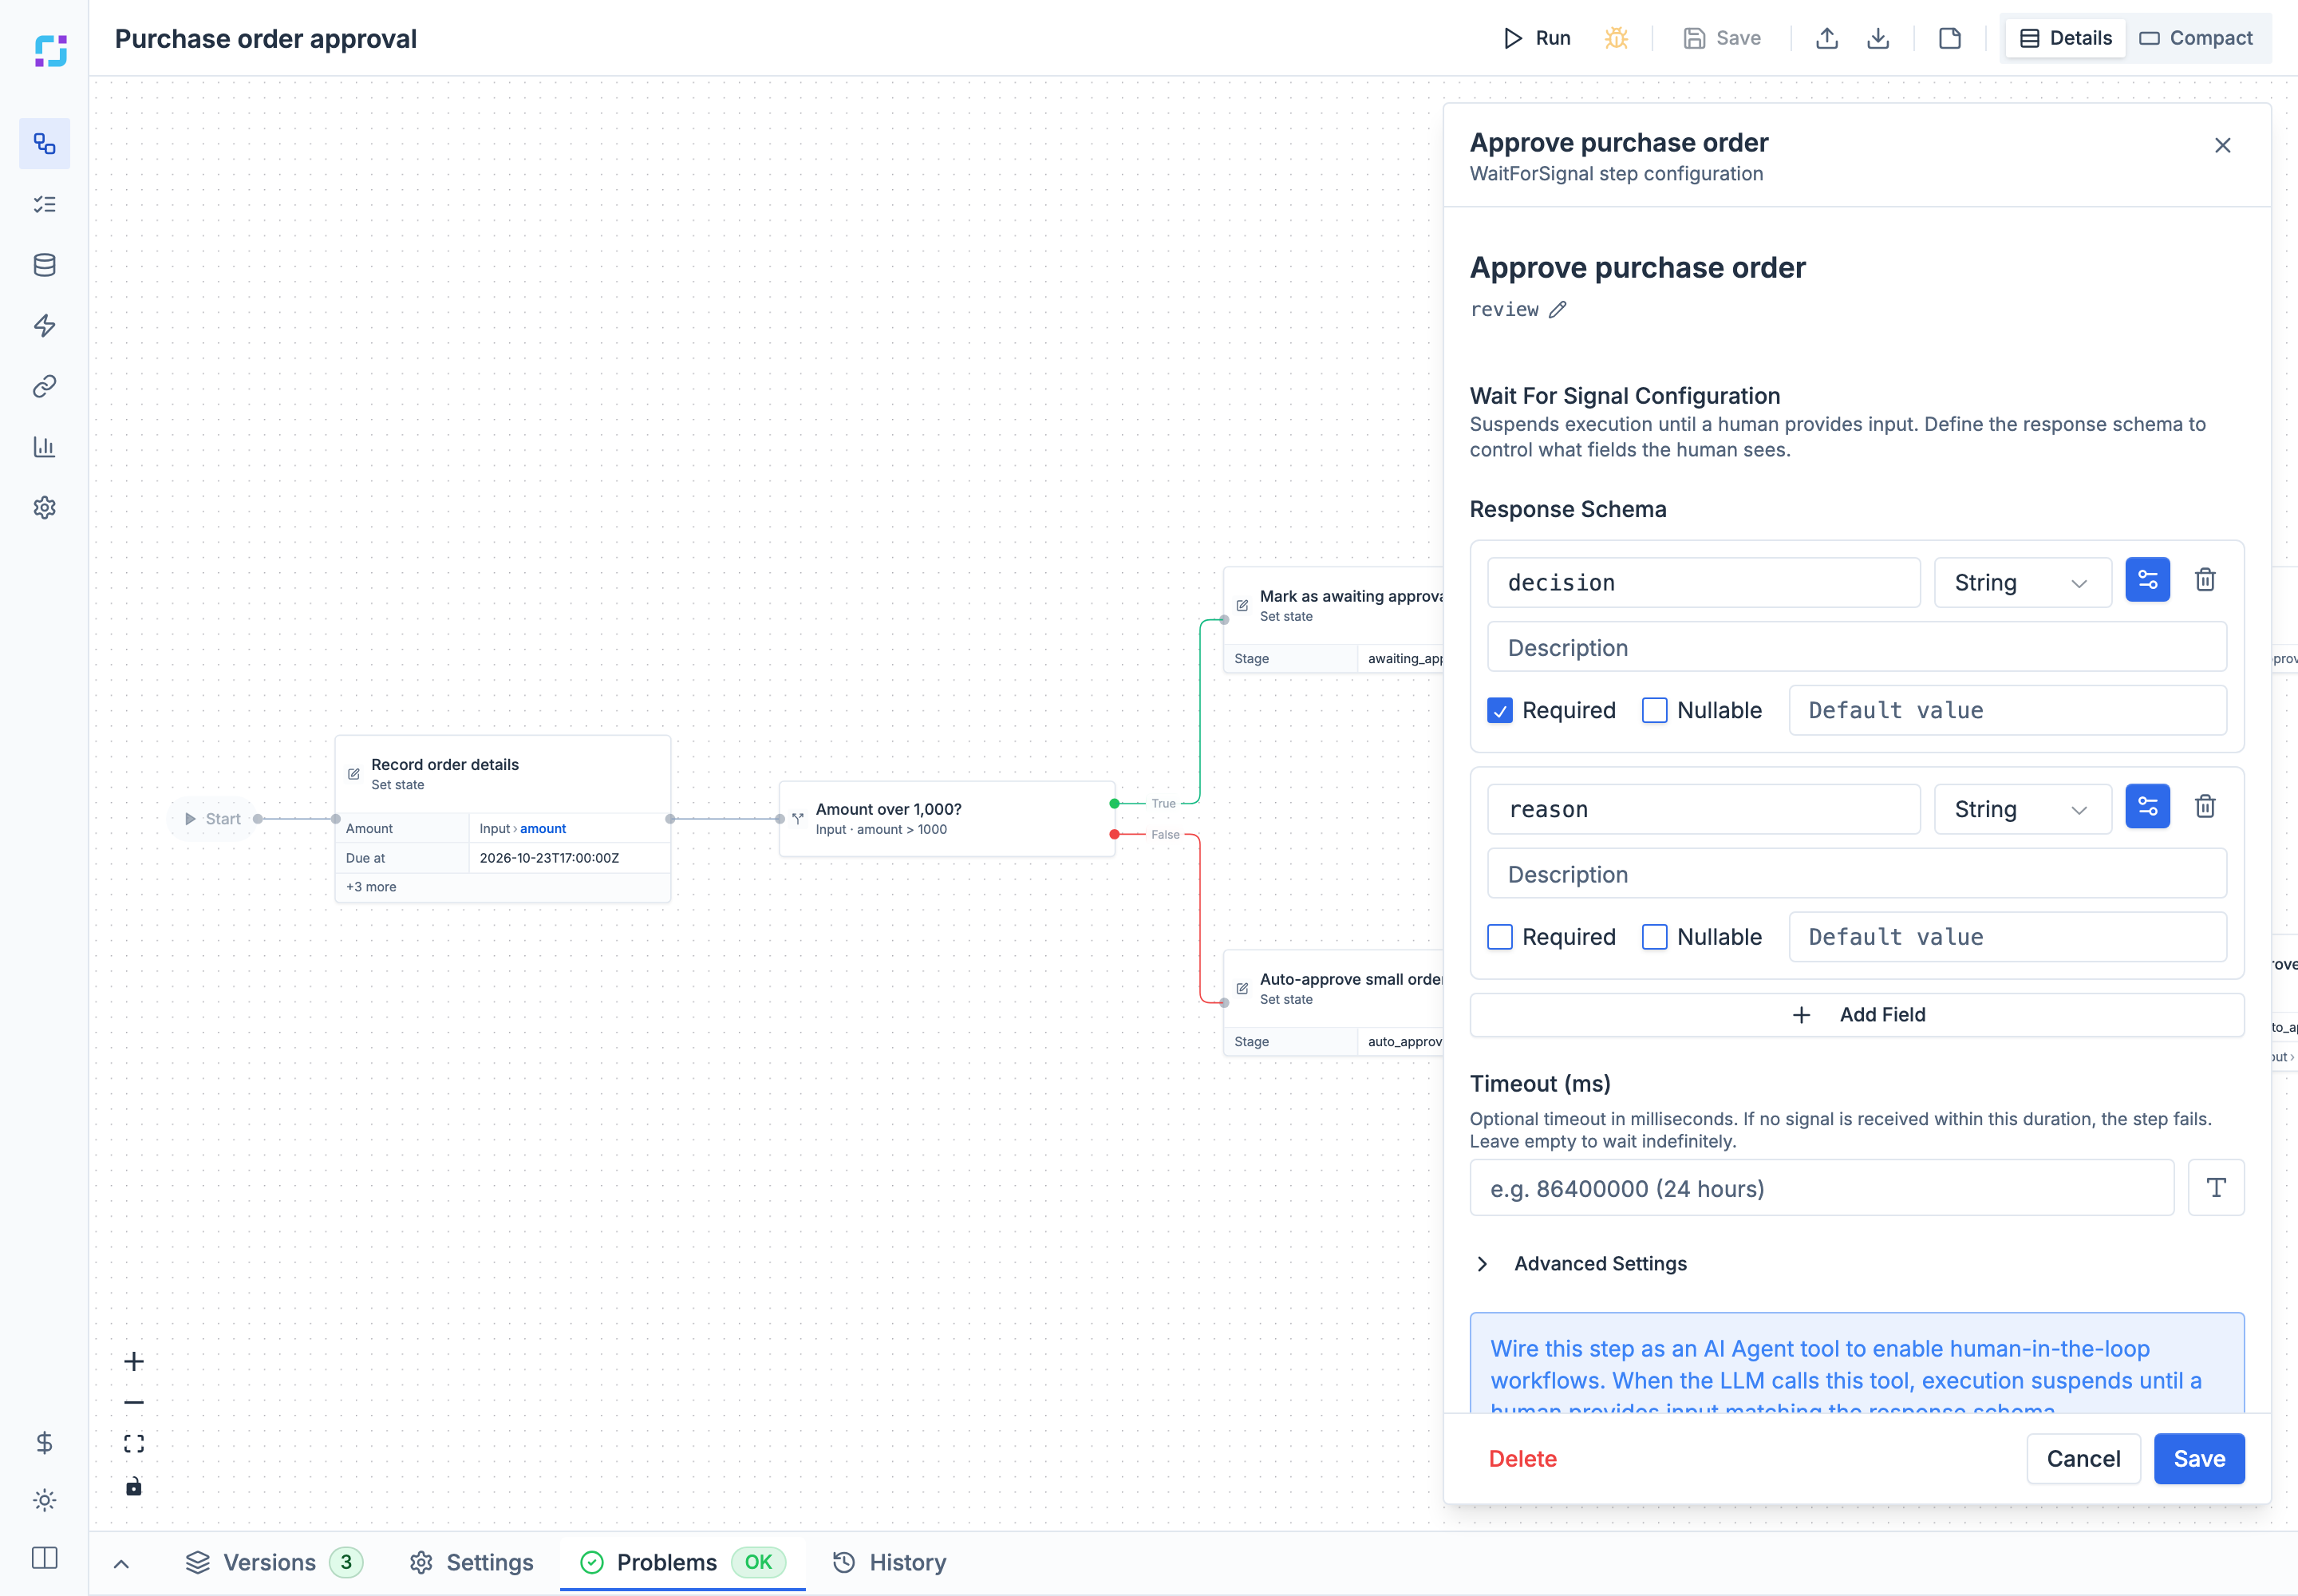
Every step panel has:
- Step name at the top. Use a name that says what the step does; it appears in run history, Operations, and error messages.
- Step ID under the name, used to refer to the step’s outputs, for example
steps.review.outputs.decision. Select the pencil icon to change it. - The step’s own settings. See Workflow steps for each type.
- Output — what this step produces: the shape of the step’s outputs, so you know what later steps can use.
- Execution: Breakpoint (pause here when debugging), Durable (the step can be suspended and resumed safely), and, for agent and sub-workflow steps, Retries, Retry delay (ms), and Timeout (ms). The summary next to the heading shows what you changed, or “all at defaults”.
Select Save in the panel to keep the step’s changes, then Save in the toolbar to create a new version. Select Delete to remove the step. If you close a panel with unsaved edits, you are asked whether to discard them.
Agent steps
Agent steps call a system or service: an API, a database, an AI model, file storage, and so on. Their panel shows:
- The agent and capability, for example Object Model → create-instance. Select it to pick another capability. Changing it clears the step’s inputs.
- The connection next to it. Select it to choose another connection, or None (Manual auth).
- The Main tab with the capability’s parameters, and Add optional parameter / Add custom parameter for more.
- The Testing tab, where Run Test calls the capability with the current values and shows the output, the error, the run time, and the memory used. Use it to check a connection or a mapping without running the whole workflow.
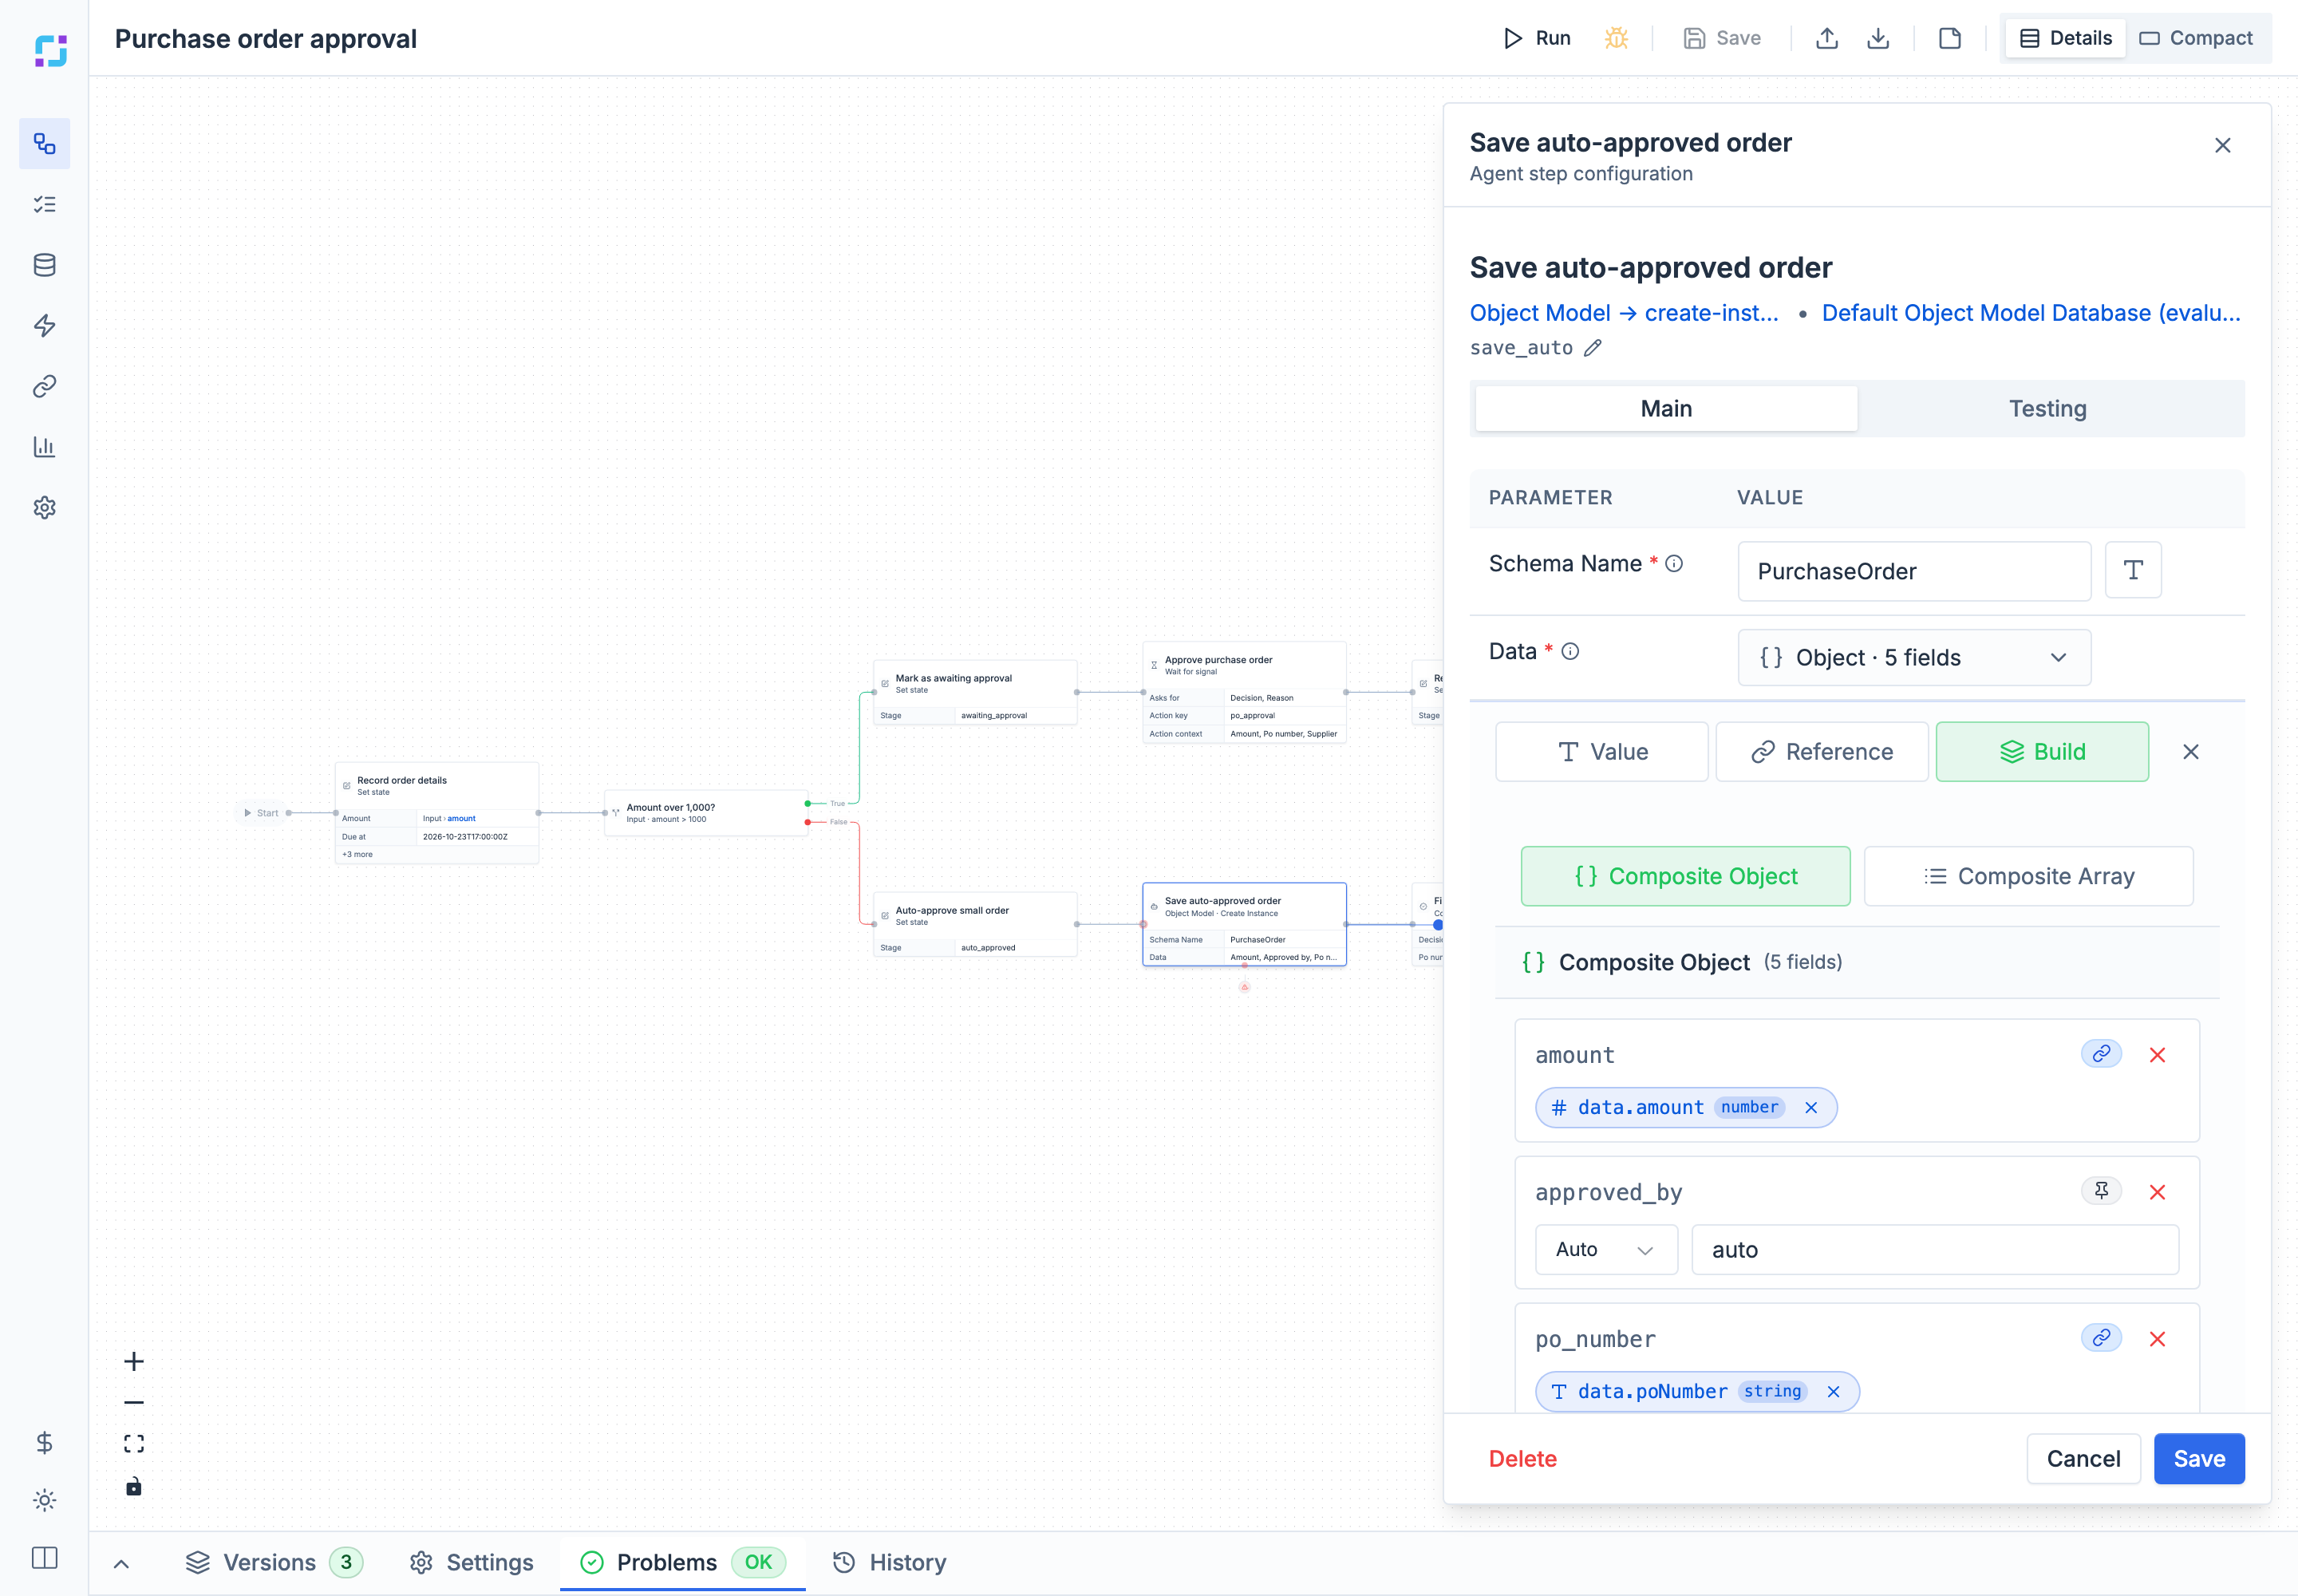
Map values into a step
Each input field has a mode button on the right. Select it to switch between:
| Mode | Use it for |
|---|---|
| Value | A fixed value typed in the field, such as PurchaseOrder or 1000. |
| Template | Text built from data, using Jinja-style templates such as Order {{ data.poNumber }} from {{ data.supplier }}. Opens a template editor with a live preview. |
| Reference | A value from the run: a workflow input (data.amount), a variable (variables.region), a previous step’s output (steps.fetch.outputs.body), or the current item in a loop. Select the field to pick from a list, and set a Fallback value for when the value is missing. |
| Build | An object or list assembled field by field, each field in its own mode. |
Fields show the expected type, and warn when a reference’s type does not match. For what each mode produces, how to read inputs, step outputs, loop items, and errors, and how to check mappings, see Data and mappings and the Mapping reference.
Bottom panel
Select a tab to expand the panel, and the arrow on the left to collapse it.
Versions
Every Save creates a new version. The Versions tab lists them, newest first.
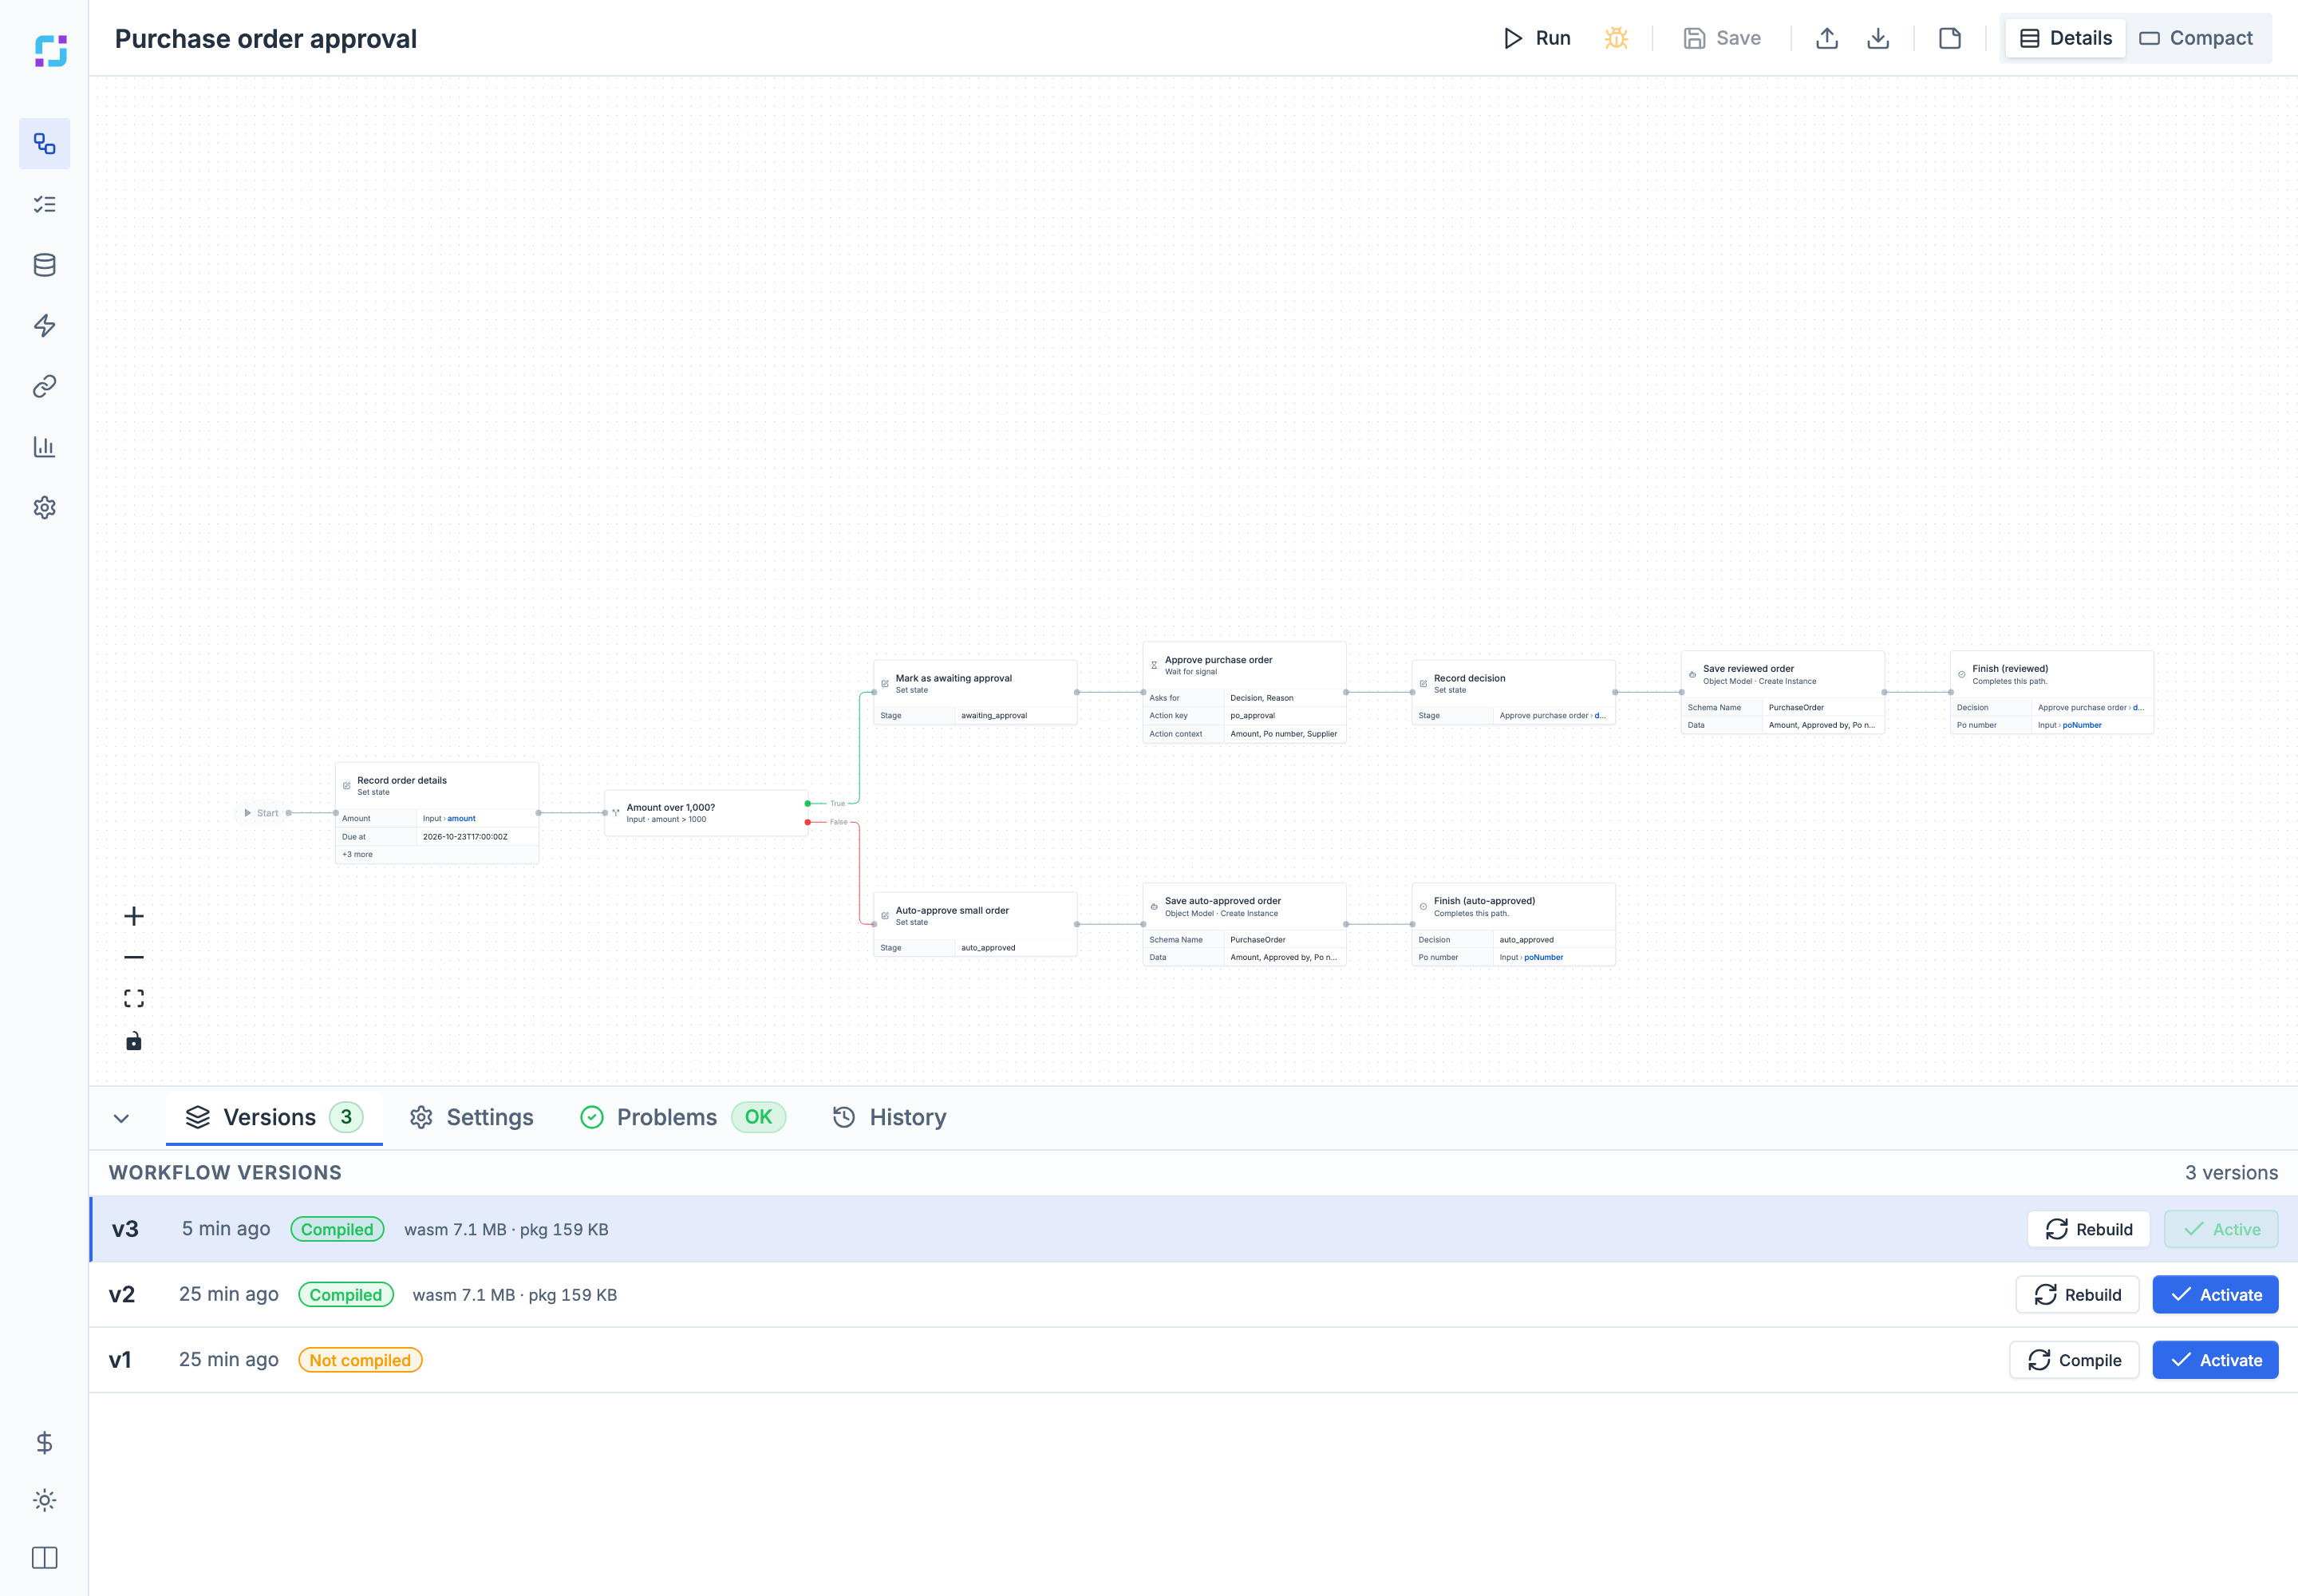
- Each version shows its number, when it was saved, and its build status: Compiled, Not compiled, Compiling, or Failed (hover for the reason).
- Compile builds a version that has not been built yet; Rebuild builds it again from scratch.
- Activate makes a version the one that runs when the workflow is started. The active version is marked Active. New versions usually become active when they compile.
- Select a version to open it in the editor.
Runs always record which version they used, and runs already in progress keep their version.
Workflow settings
The Settings tab has five sections: General, Variables, Input, Output, and State.
General
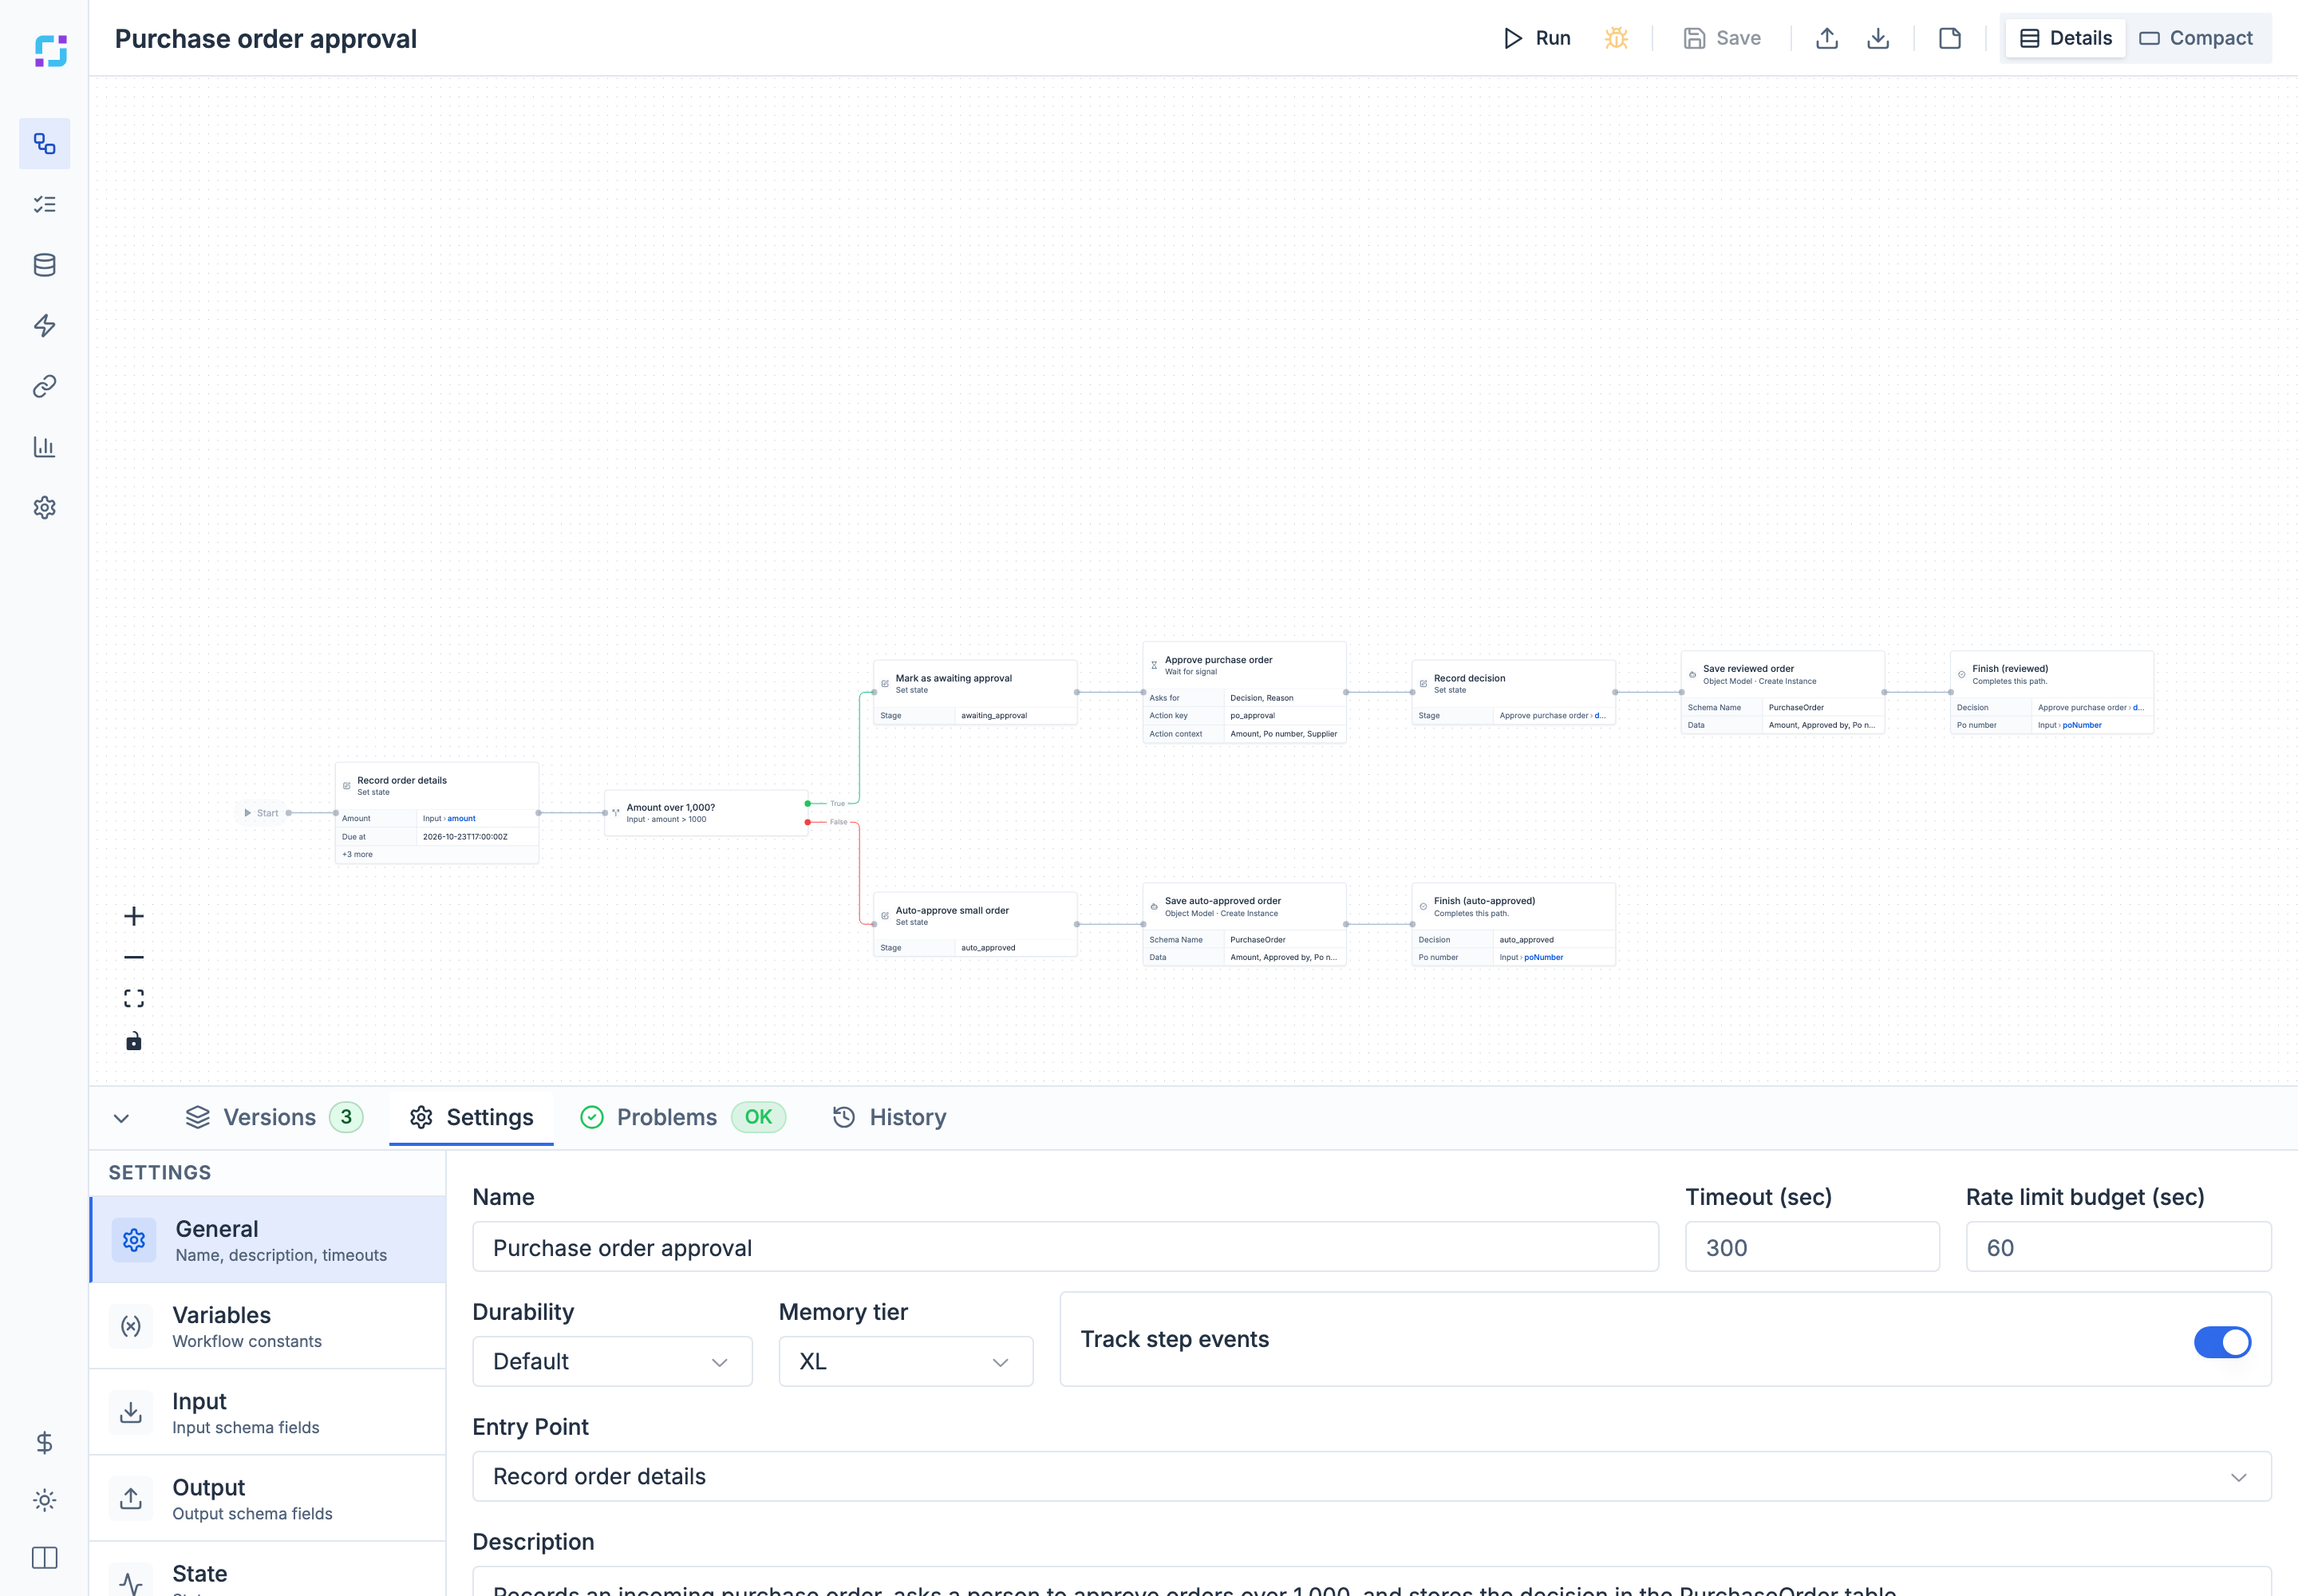
| Setting | Meaning |
|---|---|
| Name | The workflow name. |
| Timeout (sec) | The longest a run may take, 1 to 3600 seconds. Default 300. |
| Rate limit budget (sec) | How long, in total, steps may wait and retry when a connection’s rate limit is reached, before giving up. Default 60. Raise it for workflows that make many calls through a slow rate limit. |
| Durability | Durable runs checkpoint their progress and resume after a restart without repeating finished steps. Non-durable runs are lighter but cannot be suspended and resumed. Default is durable. |
| Memory tier | The memory each run gets: S, M, L, or XL. |
| Track step events | Record each step’s inputs and outputs for run history. On by default; turn it off for very high-volume workflows. |
| Entry Point | The first step. Auto picks it from the canvas. |
| Description | What the workflow does. Shown in the workflows list. |
Variables are named constants shared by all steps, such as a region code, a threshold, or a connection. Each has a Name, Value, Type (String, Number, Integer, Boolean, Object, Array, File, or Connection), and Description. Steps refer to them as variables.<name>.
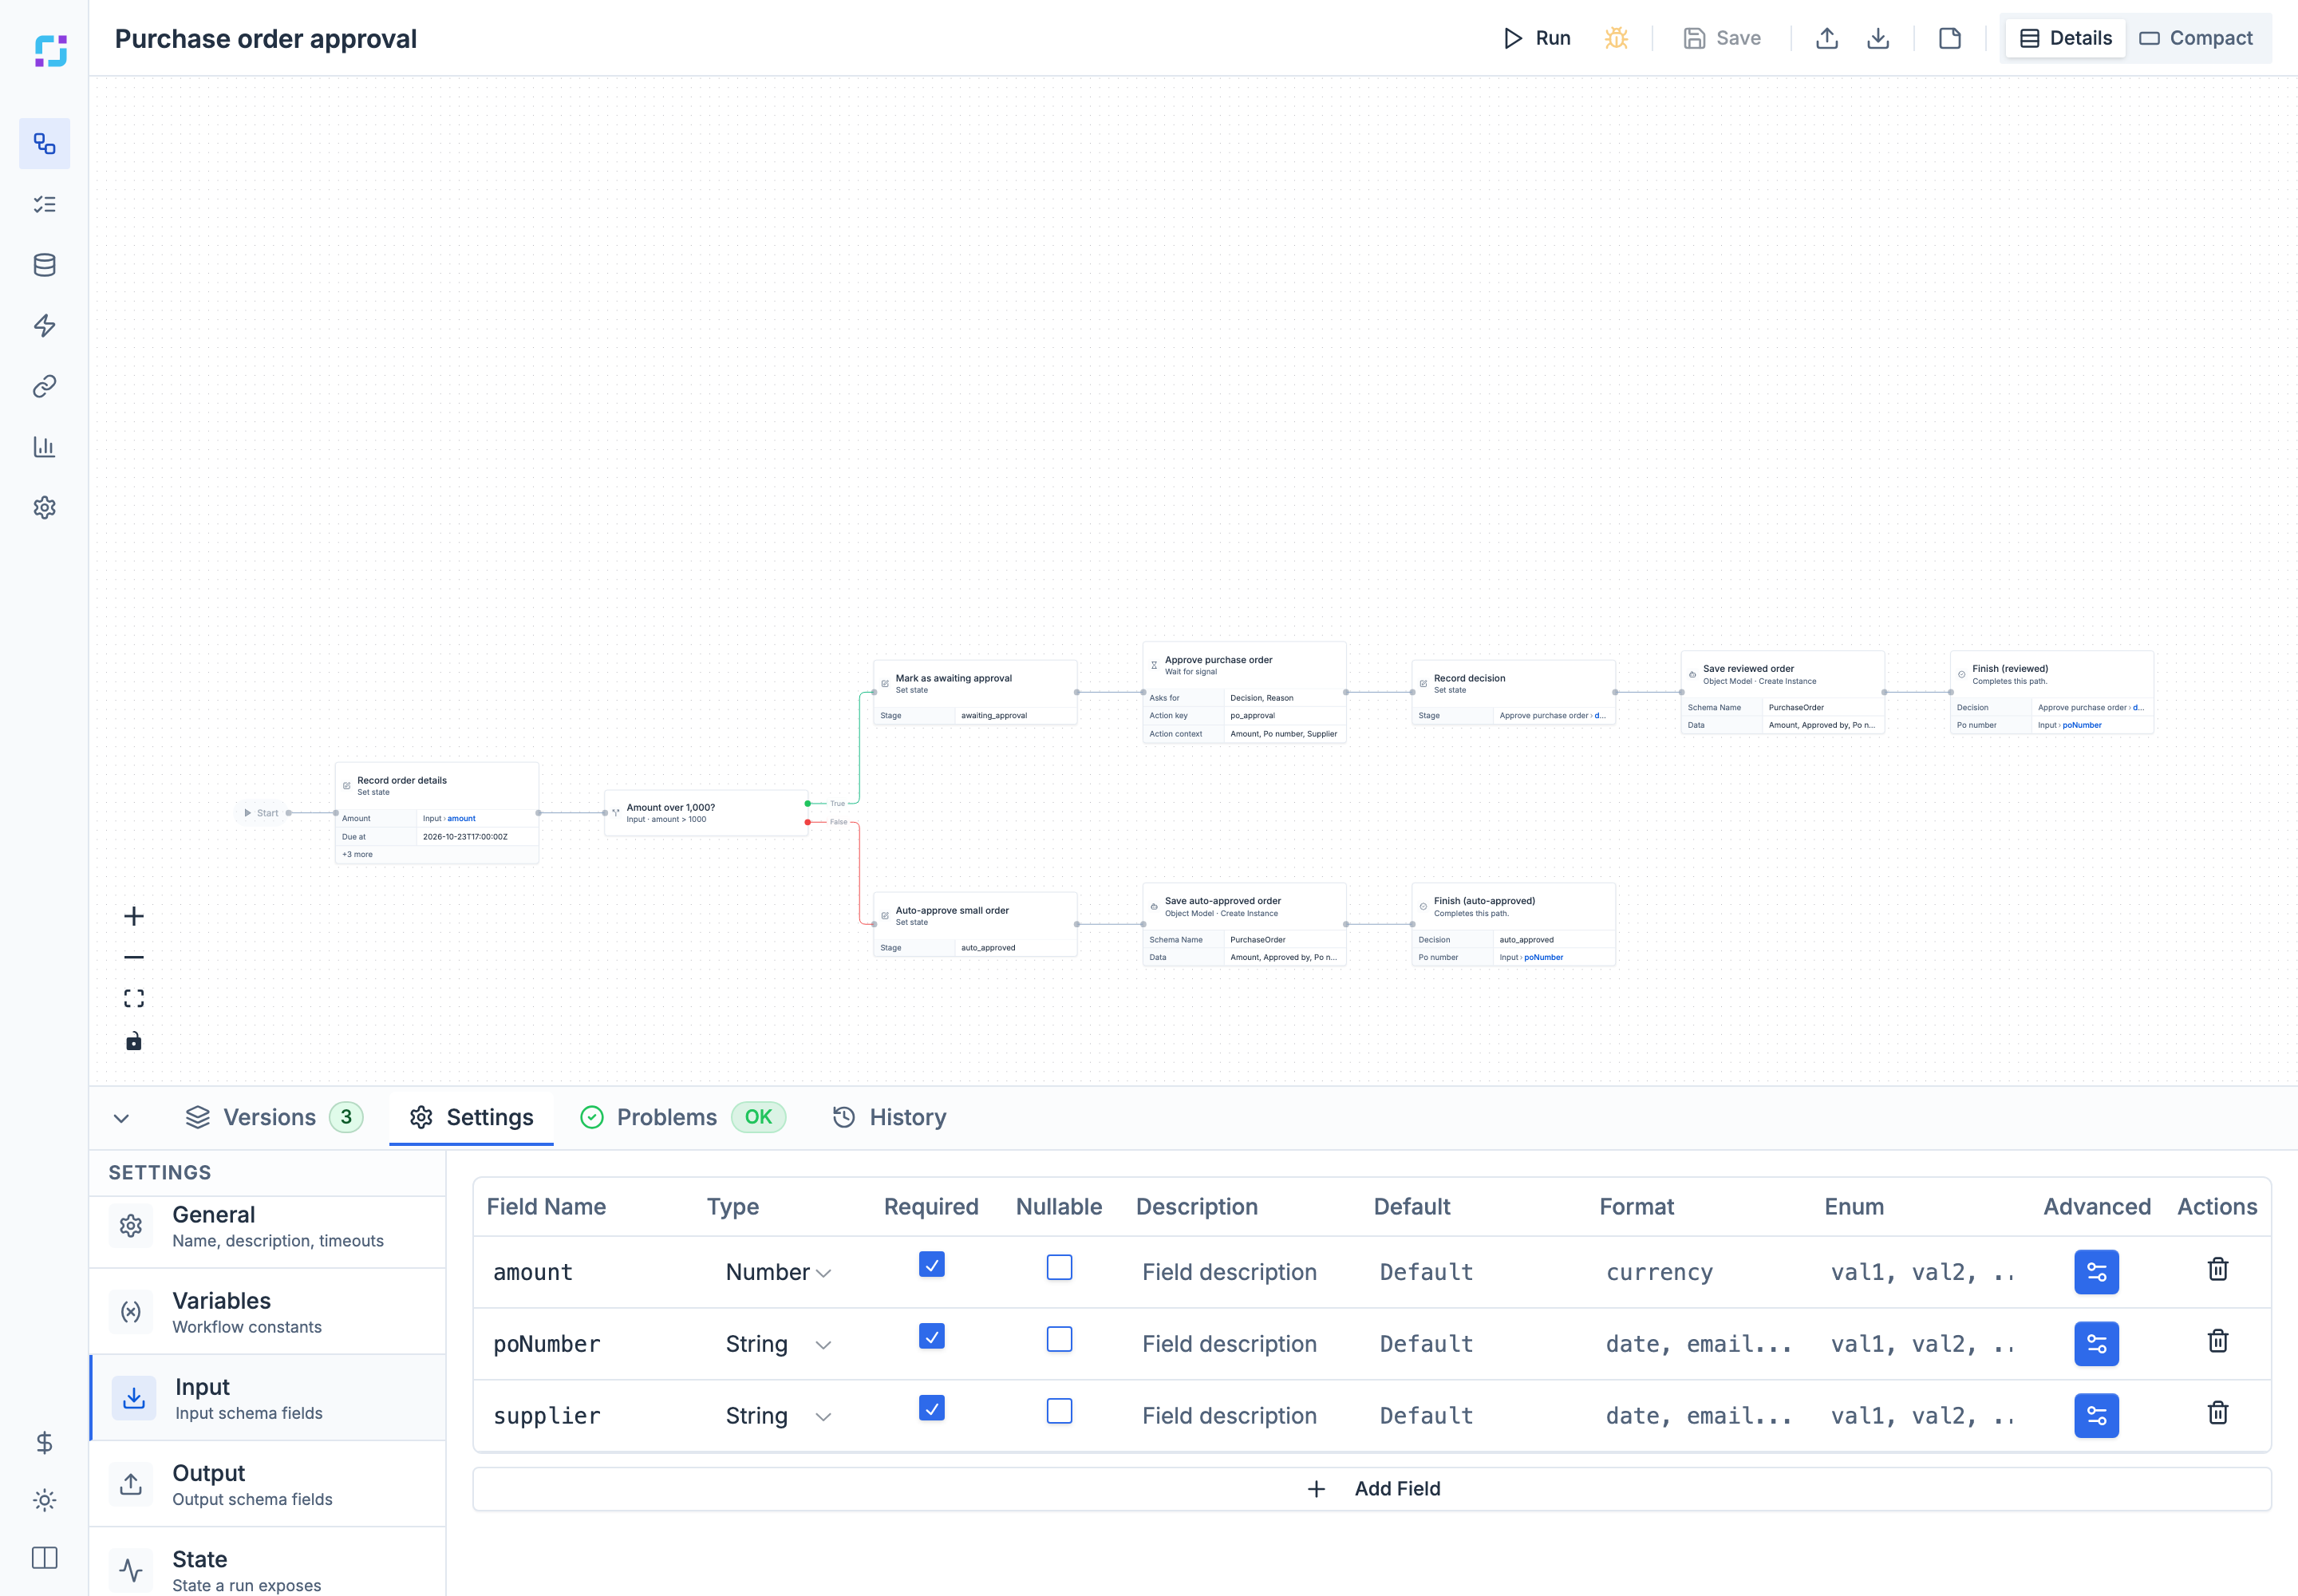
Input defines what the workflow needs when it starts. The run dialog, schedule forms, and API validation all use it. Output defines what the workflow returns. State defines the values a run publishes while it runs, for Operations queues.
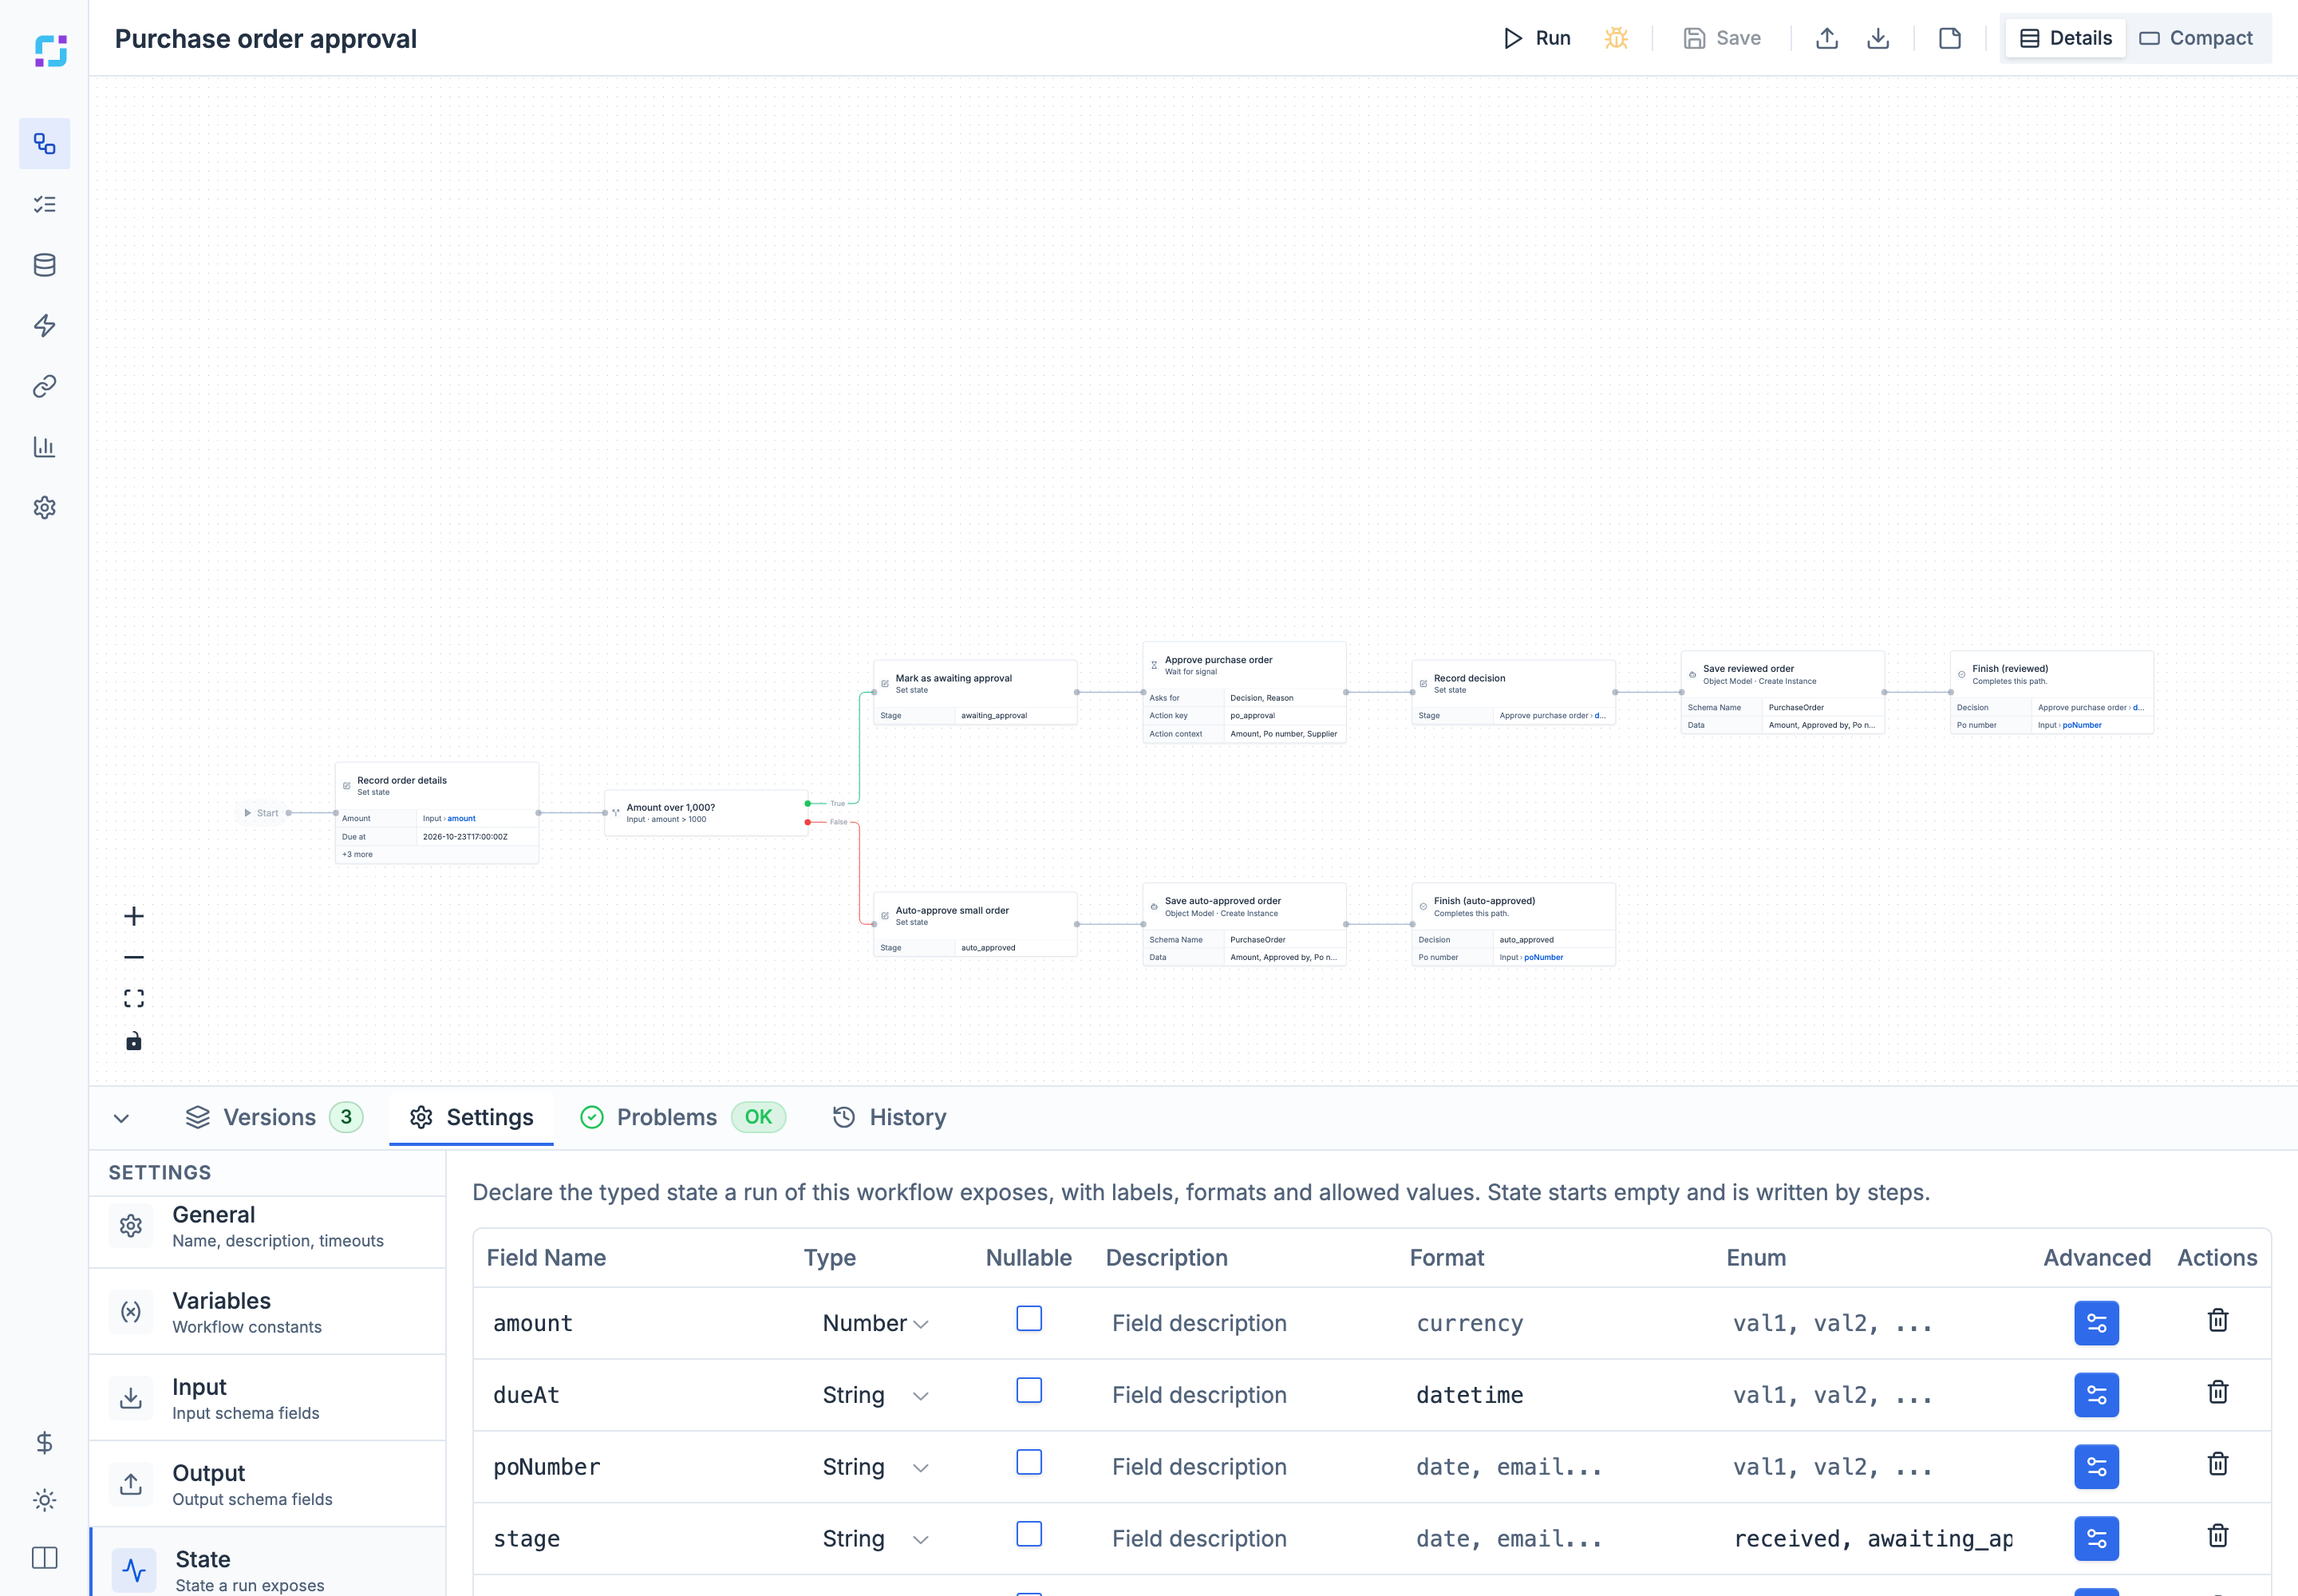
Each field in Input, Output, and State has a Field Name, Type, Required, Nullable, Description, Default, Format (such as date, email, or currency), and allowed values (Enum). The gear button opens Advanced Schema for display labels, placeholders, order, minimum and maximum, a pattern, examples, the shape of lists and objects, and rules that show a field only when another field has a certain value.
Problems
The Problems tab lists validation messages. A green OK badge means there are none. Validation errors explains every code.
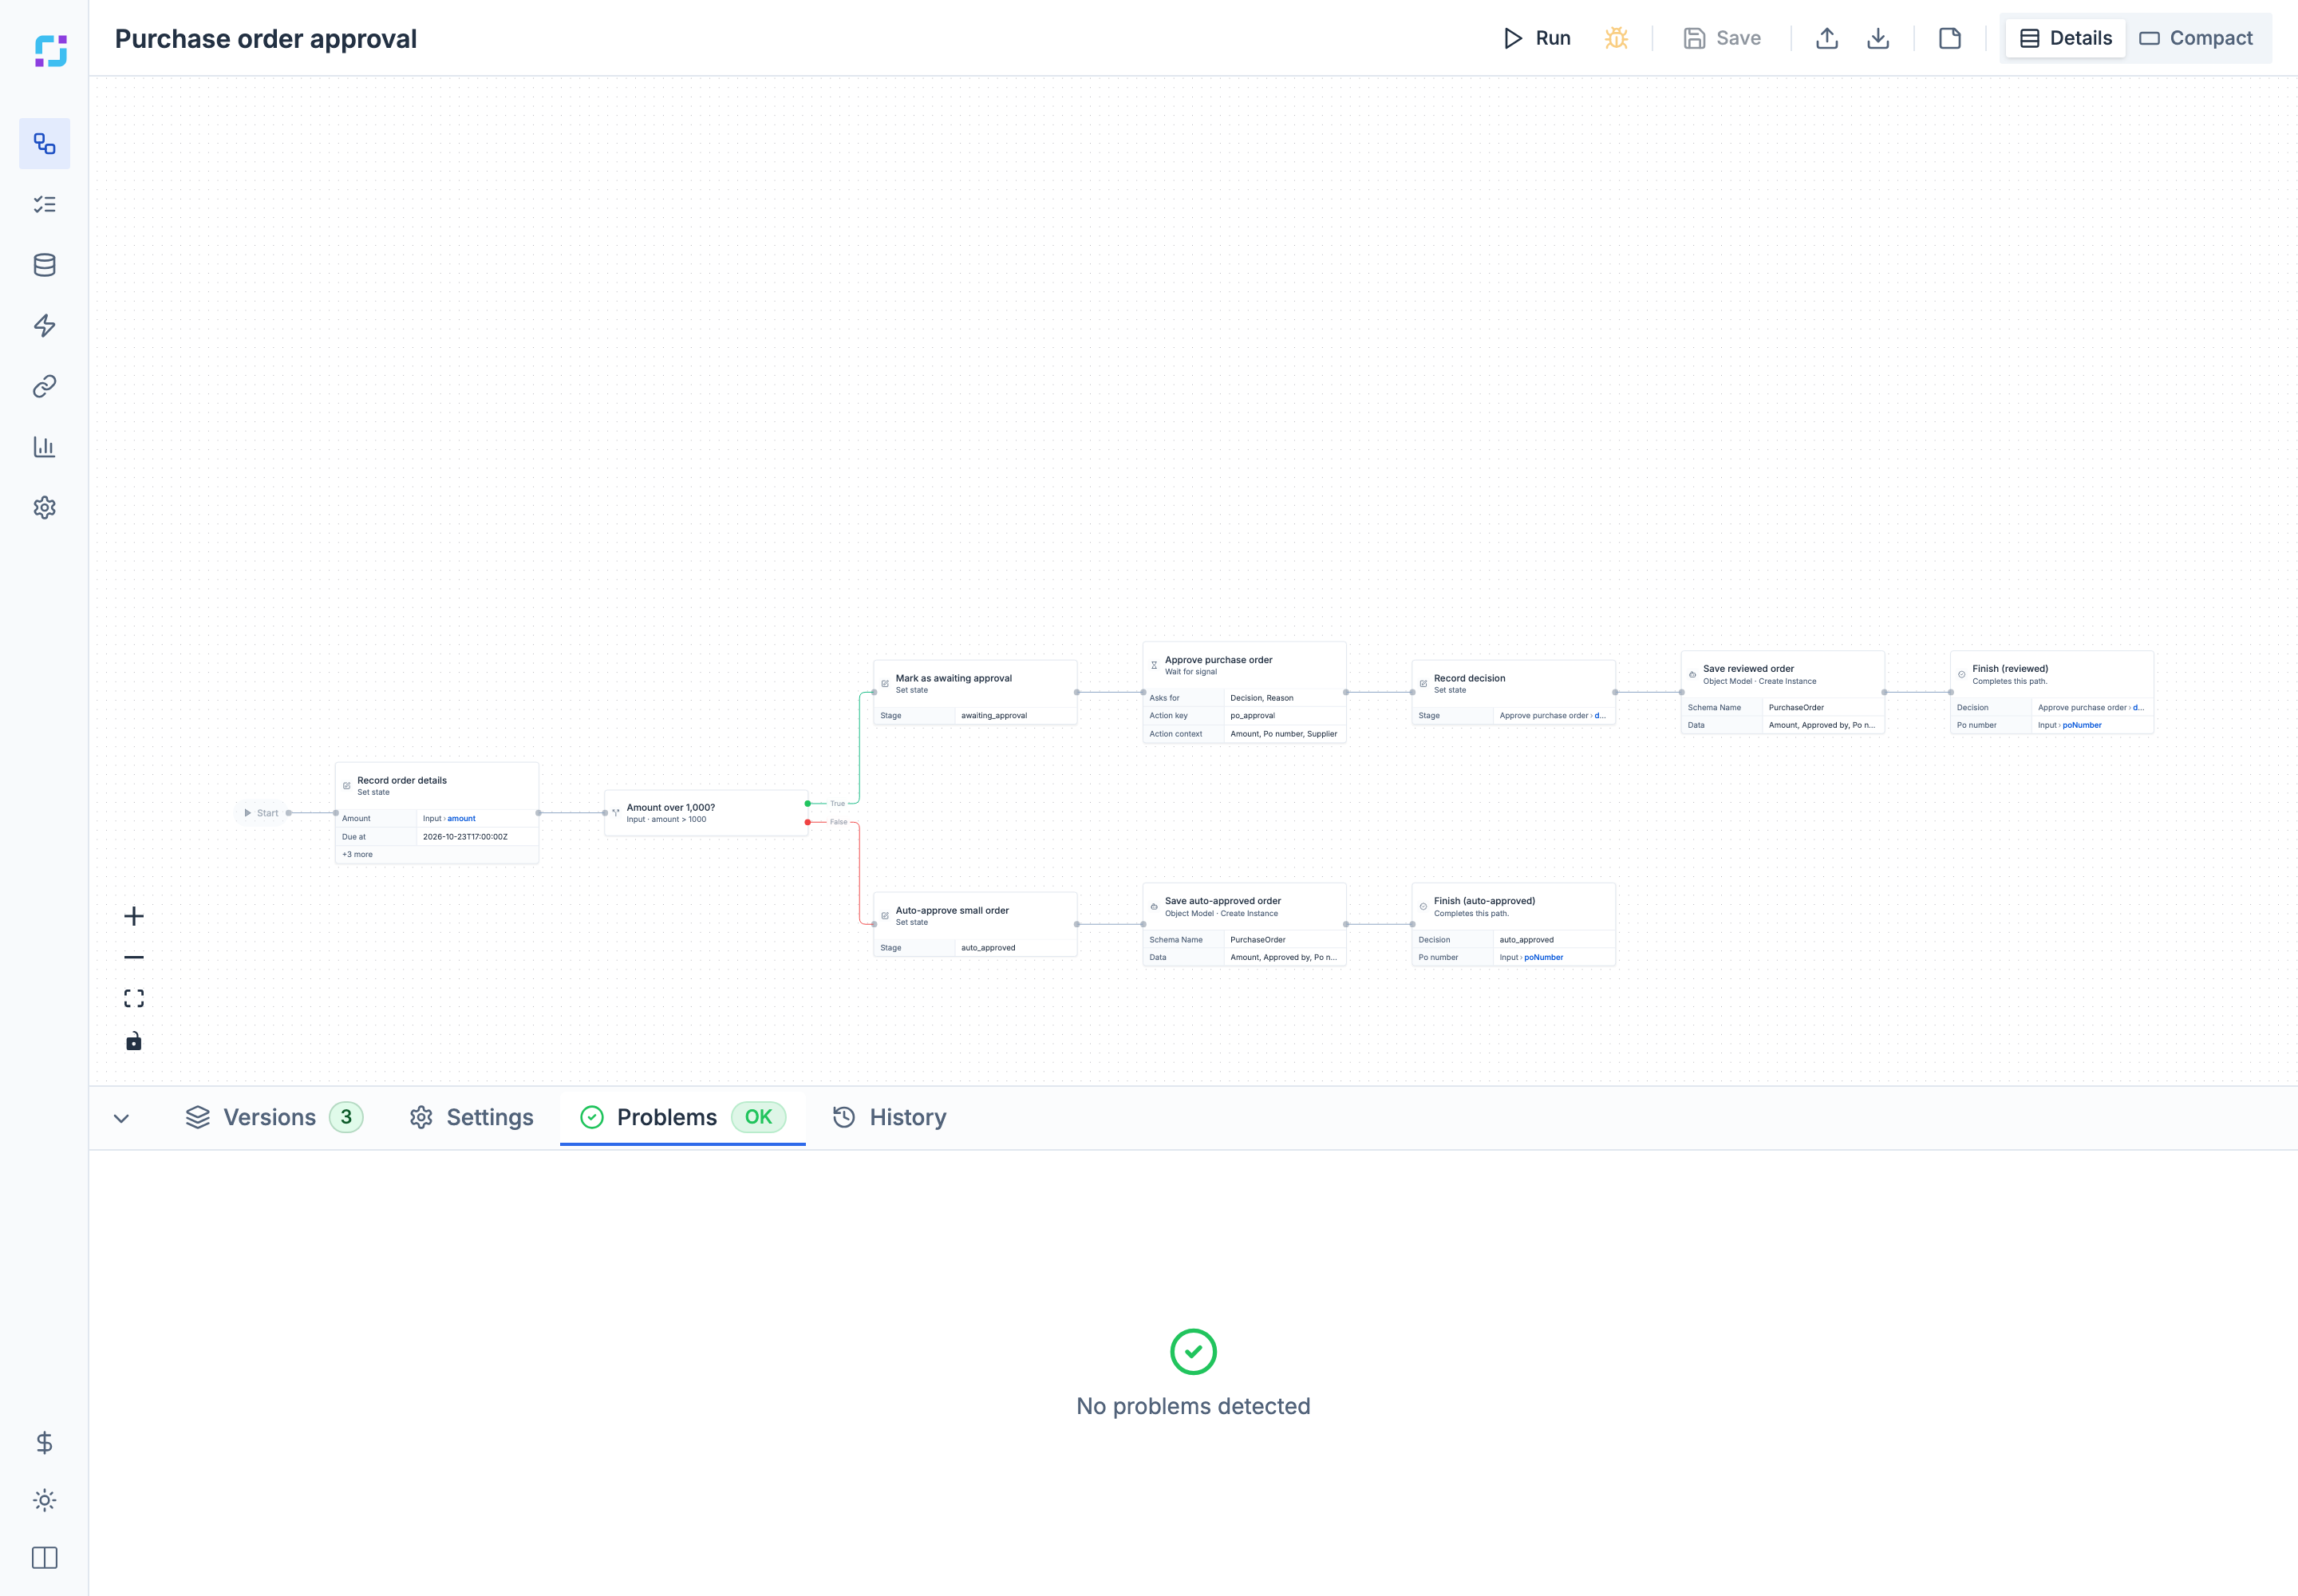
- Errors (codes starting with E) block saving. Examples: no steps, no entry point, a step not connected to anything, a Finish step with an outgoing line, a loop that never ends, or a long-running capability that is not durable or has no timeout.
- Warnings (codes starting with W) do not block saving. Examples: no description, an unused variable, a very long step name.
- Filter by All, Errors, or Warnings. Select a message, or Go to step, to jump to the step.
When a save fails validation, the panel opens on Problems and selects the first failing step.
History
The History tab shows the five most recent runs of this workflow, with their label, version, duration, and status. Select a run to see its steps with duration and status; expand a step for its inputs, outputs, and errors. View all opens Runs filtered to this workflow.
Debug a workflow
- Set breakpoints: hover the left edge of a step card and select the red dot (Set breakpoint), or turn on Breakpoint under Execution in the step panel. Select the dot again to remove it.
- Save, then select Debug in the toolbar. Enter inputs if asked.
- The run stops before each step with a breakpoint. Steps not reached yet are dimmed. Select a step to see its resolved inputs, outputs, and errors in the inspector.
- Select Continue to run to the next breakpoint, or Stop to end the run.
A run that is paused or waiting can be re-attached later: in the History tab, select the bug icon (Reattach) next to it, or choose Open in editor in Runs.
The Debug button’s tooltip mentions right-clicking a step to set breakpoints. Right-click does nothing; use the red dot or the Breakpoint switch.